
This post may contain affiliate links. Please read our disclosure policy.
Homemade Marshmallow Easter Eggs are sweet, chocolatey, and colorful treats with a fluffy marshmallow center that both kids and adults will enjoy.
These Marshmallow Easter Eggs are the perfect addition to your Easter baskets.

Sure, you can easily buy store-bought Brach’s marshmallow Easter eggs, but there is something special about making your own homemade version.
You can involve the kids and make it fun! You won’t have any hollow chocolate eggs because our homemade version has a delicious fluffy marshmallow filling.
Table of Contents

You can create a personalized Easter treat that your friends and family will love by crafting your own homemade marshmallows and marshmallow eggs and dipping them in a decadent, silky chocolate coating.
By crafting your own marshmallows and dipping them in a decadent, silky chocolate coating, you can create a personalized Easter treat that your friends and family will love.
Why You'll Love Homemade Marshmallow Eggs
- Colorful - As soon as you see these cute, colorful Easter Marshmallow Eggs, you can't help but smile. It's inevitable because they are adorable.
- Sweet Chocolate and Marshmallow - These Chocolate Marshmallow Eggs taste delicious! How could they not with silky chocolate and a fluffy, sweet marshmallow filling?
- Customizable Designs - You and the kids can enjoy decorating these eggs. You can personalize them for you or for someone you love.
- Easy To Make - These decorated eggs are easier to make than you think. You can make a beautiful, edible Easter egg with only a few simple ingredients.

Ingredient Notes
Below, I discuss the ingredients and possible substitutions if you don't have a specific ingredient. However, if you are looking for the specific measurements of each ingredient, scroll down to the bottom of this article, just above the comments, for the printable recipe card, which includes all the ingredients and the specific amounts of each one.

Outer Shell
- Chocolate Melting Wafers – The chocolate wafers melt smoothly and make a silky melted chocolate coating for the marshmallow eggs. You could also use white chocolate melting wafers to decorate the outside of the chocolate eggs.
- Colored Candy Melts or sprinkles – These are to decorate the outside of the chocolate marshmallow eggs.
Marshmallow Filling Ingredients
- 1 Egg or Colored Egg to create the molds
- Unflavored Gelatin - You'll need three 1/4 ounce envelopes of unflavored gelatin.
- Granulated Sugar
- Corn Syrup
- Water
- Salt
- Vanilla - I recommend using real, pure vanilla extract and not imitation vanilla.
How To Make Marshmallow Easter Eggs

- Spread the flour evenly in a large 11×17 inch pan with deep sides, ensuring it is about ½ inch deep. Press an egg into the flour every 1 to 2 inches apart to make the egg molds.
- Pour ½ cup water into the bowl of a stand mixer and sprinkle the gelatin over the water. Let sit at room temperature for 3 minutes.
- In a saucepan, combine the remaining ½ cup water, sugar, corn syrup, and salt and cook over medium heat. Let the syrup come to a boil and cook. Use a candy thermometer and cook without stirring until the thermometer reads 240°.
- Turn the mixer on low, carefully pour the syrup slowly into the gelatin, and add the vanilla. Beat it on medium-high for 10 to 13 minutes until it has cooled and is thick and fluffy. The mixture should not be as hard or thick as when making marshmallows, just soft and fluffy.
- Spray 2 tablespoons with cooking spray, scoop a large tablespoon of the marshmallow mixture, and fill the egg molds, using the second spoon to scrape it off the other spoon. Repeat until all the molds are full.
- After 10 minutes, carefully flip the eggs in the flour to coat the other side. Don't press down on them.
- Let the marshmallows dry for 2 hours.
- Gently lift the marshmallows and gently brush the flour off. You can lightly tap on the eggs to remove the flour.
- Use scissors to trim any rough edges from the sides of the marshmallows.
- Place the chocolate melting wafers in a bowl and microwave on high for 20 seconds, stir, then microwave for an additional 15 seconds as needed until the chocolate is melted and smooth.
- Spray a parchment paper with cooking spray and place on a tray.
- Use a fork and dip the marshmallows in the chocolate, making sure to coat all sides. Tap the fork on the side of the bowl to remove excess chocolate, then slide onto the parchment paper. Repeat until all the eggs have been coated.
- Melt ¼ cup of each color of the candy melts. Pour them into small ziplock bags and snip a small corner of each bag. Draw pretty designs over the eggs. You may need to reheat the bags of candy melts to re-soften if they get hard.
- Let them harden for another 30 - 45 minutes.

Recipe Tips
- Gelatin needs to bloom in the water. This ensures that the homemade marshmallow recipe is smooth and that the candy has no gelatin lumps.
- Spread the flour evenly in a large pan, ensuring there is about a ½ inch of flour. You must press eggs (real or plastic) down halfway to form the egg shape.
- You can use scissors to trim the marshmallow eggs up. As you are spooning the mixture into the molds, it can be messy and drip. Don't worry. It will dry, and then you can trim it.
- It is IMPORTANT to spray your spoons with cooking spray to prevent the marshmallows from sticking to the spoons. You may need to repeat it occasionally if it starts to stick.
- Save some eggs for the Easter bunny! He worked hard on Easter morning, and he will enjoy these marshmallow Easter eggs like everyone else.
What To Serve with Easter Marshmallow Egg?
- Colorful Easter Sugar Cookie Bars with Peeps
- Rainbow No Bake Cream Cheese Pie
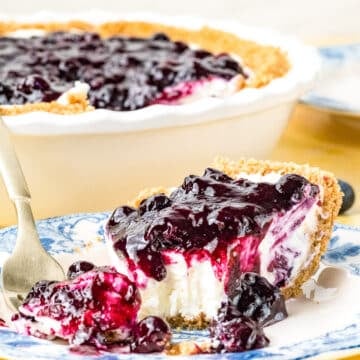
- Easy Blueberry Pie
- Donut Hole Cake Pops - Decorated with sprinkles.

FAQs
It is important to bring the sugar to the correct temperature. If it is not hot enough, the marshmallow filling can be mushy.
To prevent gelatin lumps in the marshmallow filling, you must allow the gelatin to “bloom” in water.
Once the chocolate coating has completely hardened, then you can place the marshmallow eggs in an airtight container and place them in the refrigerator. It needs a cool place for storage.
Marshmallow eggs can last up to 3 weeks if stored in a cool place without heat and humidity.

Equipment Required
- 11×17 sheet pan with deep sides
- Stand Mixer or hand mixer
- Mixing bowl
- Saucepan
- Large spoon
- Scissors
- Fork
- Parchment paper
- Ziplock bags or pastry bag
If you enjoy this Easter Marshmallow Eggs recipe, be sure to leave a 5-star rating and review. For more recipes to celebrate the Easter holiday, be sure to visit our Flavor Mosaic's collection of Easter Recipes.
Recipe
Easter Marshmallow Eggs

Ingredients
- 6 – 8 cups all-purpose flour
- 1 egg or colored egg to create the molds
- 1 cup cold water divided
- 3 1/4 ounce envelopes unflavored gelatin
- 1 1/2 cups granulated sugar
- 1 cup light corn syrup
- 1/2 teaspoon salt
- 1 tablespoon vanilla extract or 2 tablespoons orange or raspberry extract
- 12 ounces dark chocolate melting wafers Ghirardelis
- Colored candy melts or sprinkles
Instructions
- Spread the flour evenly in a large 11×17 inch pan with deep sides, making sure it is about ½ inch deep. Press an egg into the flour every 1 to 2 inches apart, to make the egg molds.
- Pour ½ cup water into the bowl of a stand mixer and sprinkle the gelatin over the water. Let sit for 3 minutes.
- In a saucepan, combine the remaining ½ cup water, sugar, corn syrup and salt and cook over medium heat. Let the syrup come to a boil and cook. Use a candy thermometer and cook without stirring until the thermometer reads 240°.
- Turn the mixer on low and carefully pour the syrup slowly into the gelatin, and add the vanilla. Beat it on medium high for 10 to 13 minutes, until it has cooled and is thick and fluffy. The mixture should not be as hard or thick as when making marshmallows, just soft and fluffy.
- Spray 2 tablespoons with cooking spray and scoop a large tablespoon of marshmallow and fill the egg molds, using the second spoon to scrape it off the other spoon. Repeat until all the molds are full.
- After 10 minutes, carefully flip the eggs over in the flour to coat the other side. Don't press down on them.
- Let the marshmallows dry for 2 hours.
- Gently lift the marshmallows and gently brush the flour off. You can lightly tap on the eggs to remove the flour.
- Use scissors to trim any rough edges from the sides of the marshmallows.
- Place the chocolate melting wafers in a bowl and microwave on high for 20 seconds, stir, then microwave for an additional 15 seconds as needed until the chocolate is melted and smooth.
- Spray a parchment paper with cooking spray and place on a tray.
- Use a fork and dip the marshmallows in the chocolate, making sure to coat all sides. Tap the fork on the side of the bowl to remove excess chocolate, then slide onto the parchment paper. Repeat until all the eggs have been coated.
- Melt ¼ cup of each color of the candy melts. Pour them into small ziplock bags and snip a small corner of each bag. Draw pretty designs over the eggs. You may need to reheat the bags of candy melts to resoften if they get hard.
- Let them harden for another 30 – 45 minutes.

Hi, I’m Michele Feuerborn, a home cook with 25+ years experience, and former AllRecipes Allstar, creating bold & easy Southern, Mexican, Tex-Mex, and Instant Pot recipes. Featured in publications like Parade and BuzzFeed. Read More…
Comments
No Comments