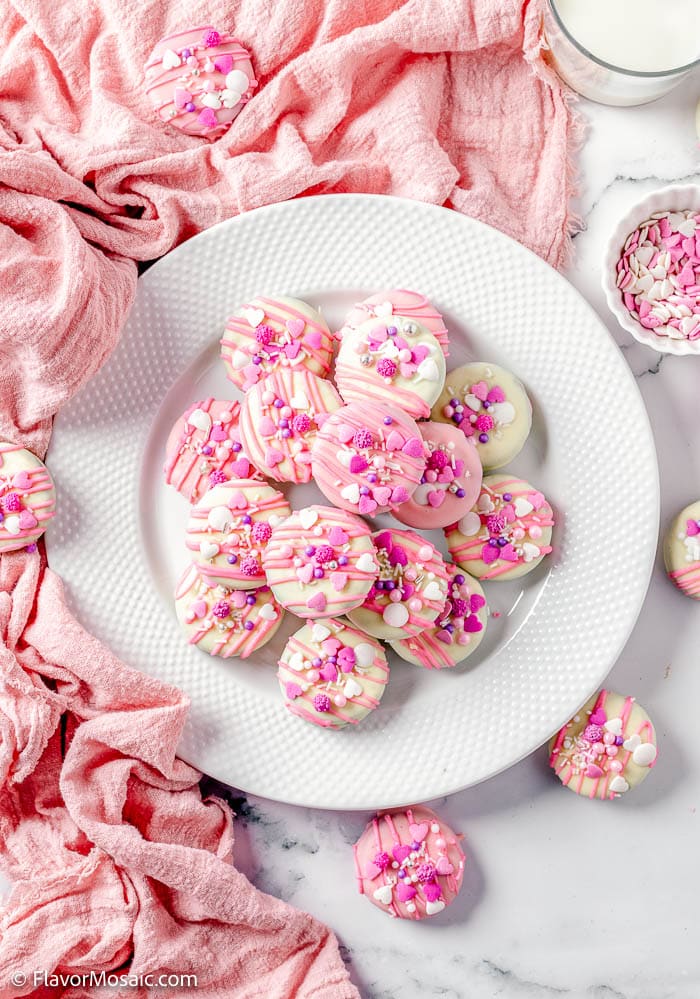
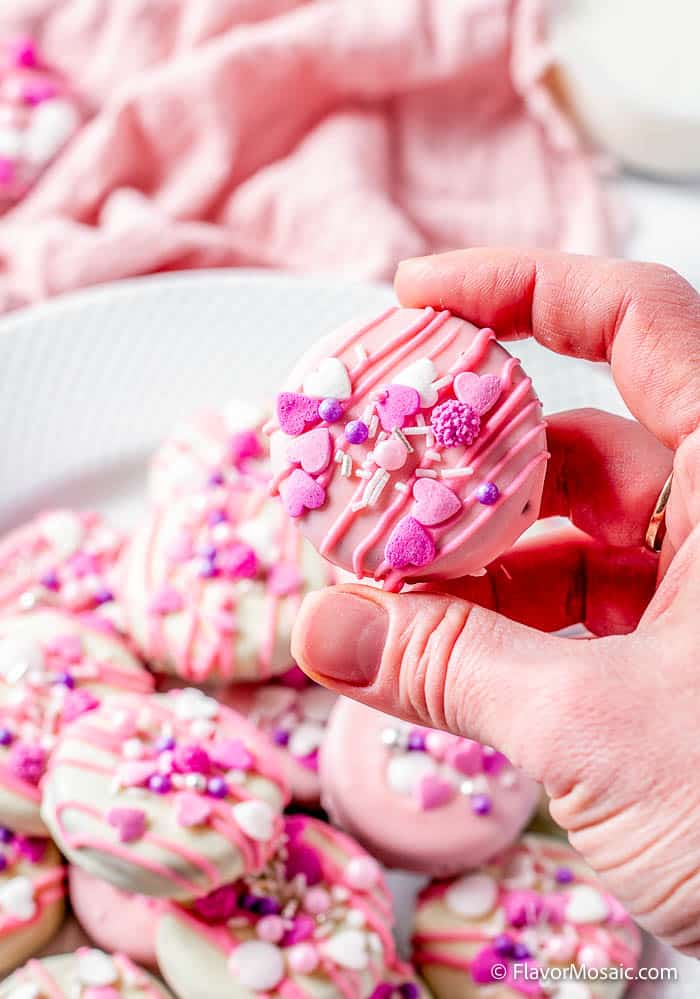
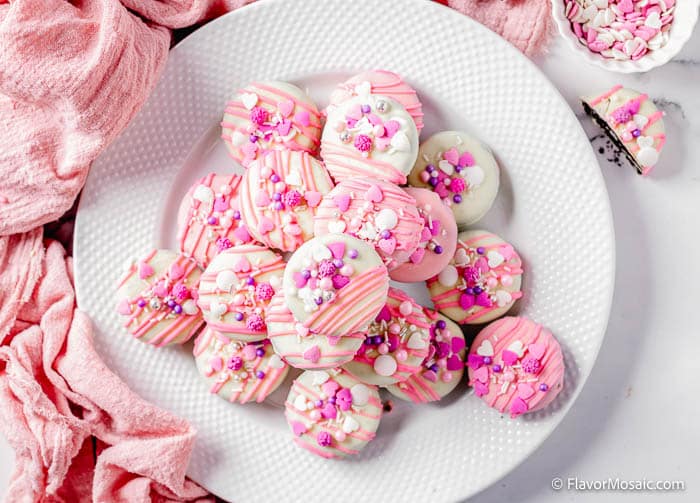
Oreo Cookies, dipped completely in a sweet, satiny white chocolate, and then decorated with your favorite candies, sprinkles, and icing, are an easy no-bake dessert perfect for any special occasion, like Valentine’s Day.
With only 4 main ingredients, these no-bake, chocolate-covered Oreos are an absolute breeze to make and can be adapted to suit your own artistic creativity with simple ingredient variations.
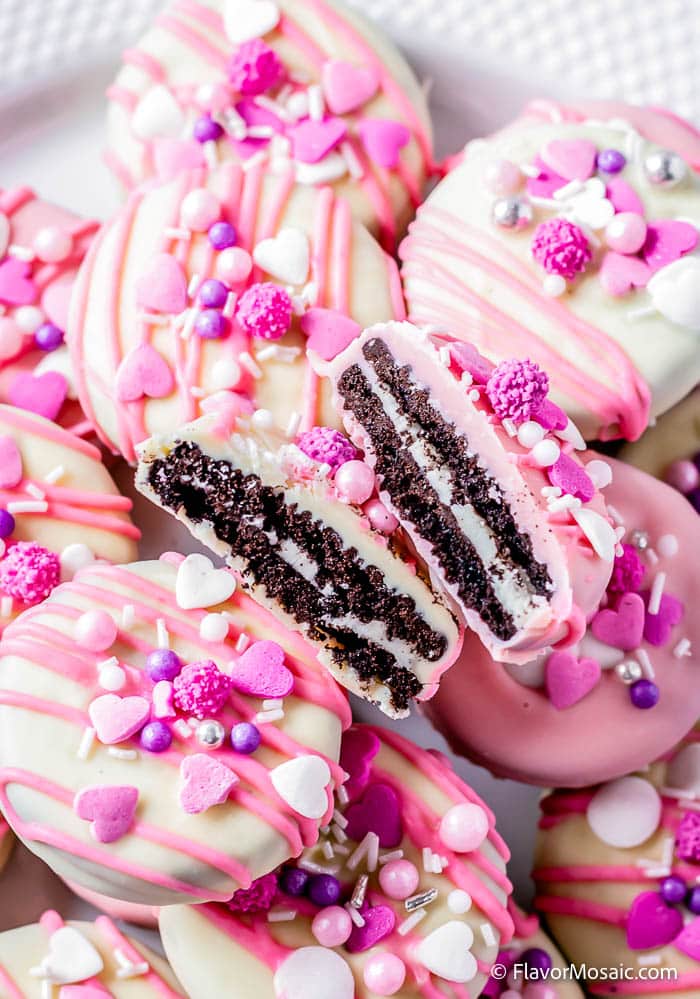
While perfect for Valentine’s Day, I’ve also made use of these gorgeous chocolate covered Oreos for other special occasions such as birthday parties, baby showers, Mother’s Day, and Christmas. That’s right…you can spread the love all year round with these Oreo treats!
These Chocolate Dipped Oreos will be one of the most fun and easy Dessert recipes you will ever make.
Table of Contents
Why You’ll Love This Recipe
- Pretty. These Chocolate Covered Oreos are incredibly pretty and will really add such a lovely splash of decoration to any table setting.
- Gifting. In addition, these Chocolate Dipped Oreos make beautiful homemade gifts that will put a smile on your loved one’s face when they see the thought and effort in making these treats.
- Kid-Friendly. It’s a very straight-forward recipe that you could easily do with the kids as a fun Valentine’s Day activity. You should oversee the chocolate melting due to risk of burns.
- Cake Topper. If you’re looking for easy yet aesthetically pleasing toppings for cakes or cupcakes then these Chocolate Dipped Oreos would be ideal!
- Versatile. While I’ve made these treats specifically with Valentine’s Day in mind, they would also be great for other special occasions such as bridal and baby showers, birthday parties, or even fancy high teas.
Why This Recipe Works
- This is a tried and tested treat, allowing me to guide you through simple and clear recipe instructions with corresponding in-process images so that there’s no guesswork at all!
- Most of the recipe time is dedicated to chilling these chocolate covered Oreos, which means that you can get on with other things in between the recipe steps.
- This is a no-bake Valentine’s treat which immediately makes it more kid-friendly if you intend to involve the kids in whipping up a batch!
- Useful tips and frequently asked questions are added in this recipe post for further clarification, making the recipe a breeze to understand and follow.
- I’ve included a few ways that you could adapt these Valentine’s Day chocolate covered Oreos with simple ingredient substitutions and suggestions.
What You’ll Need To Make Chocolate Covered Oreos
Ingredient Notes
Below, I discuss the ingredients and possible substitutions if you don’t have a specific ingredient. However, if you are looking for the specific measurements of each ingredient, scroll down to the bottom of this article, just above the comments, for the printable recipe card, which includes all the ingredients and the specific amounts of each one.
- Oreos, black or golden – I’ve used the original Oreo cookies for this recipe but you could also use the “Double Stuffed” variety if you like. Oreo has new flavors too that you can use, such as Toffee Crunch and Ultimate Chocolate.
- White chocolate chips or candy melts of different colors – if you use a substitute like almond bark or candy melts then you won’t need to add oil to achieve a smooth consistency.
- Food coloring – you won’t need food coloring if using colored candy melts. This is only necessary for almond bark or white chocolate chips.
- Sprinkles of choice – use seasonal Valentine-themed sprinkles, edible pearls, or whatever else you like to decorate your chocolate-covered Oreos.
How To Make Chocolate Dipped Oreos
- Melt chocolate chips. (Choose ONE option, whichever you prefer.)
- Option 1: Double boiler method.
- Fill a small or medium pan with one or two inches of warm water.
- Bring it to simmer over medium heat, and once water is heated through and steam released add the bowl on top. NOTE: The glass bowl should not get in contact with water.
- Add in the chocolate chips and stir constantly until about 70% of the chips are melted. Remove from the heat and continue to stir with a spatula until everything has melted and smooth.
- Option 2: Microwave Method.
- Place the candy melts in a small bowl and microwave for 30 second intervals until the chocolate is melted.
- Option 1: Double boiler method.
- Divide melted chocolate into two or more bowls if you are going to be using different colors.
- Add desired food coloring to one bowl according to packaging instructions.
- Alternatively, you can use colored candy melts and melt them the same way as described above.
- For a very smooth consistency add a drizzle of coconut or olive oil to the melting chocolate.
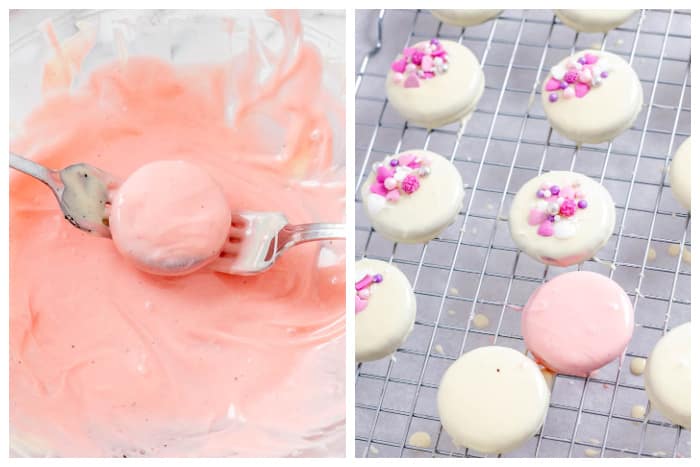
- Dip the Oreos in Chocolate.
- Using two forks, dip each Oreos into the chocolate.
- Carefully transfer the cookies to a cooling rack or parchment paper and add sprinkles.
- Let cool for a couple of minutes and refrigerate for 30 minutes or until chocolate is set.
Pro Recipe Tips
- Thin Out The Chocolate. If your melted chocolate looks and feels too thick, simply stir in 1 teaspoon of vegetable oil or coconut oil. Both are good options since they are flavorless.
- Candy Melts or Chocolate Wafers. White almond bark, candy melts or Ghirardelli white chocolate wafers can be used for coating these chocolate covered oreos instead of chocolate chips. If you do use candy melts or wafers, it’s unlikely that you will need to add in any oil while melting the chocolate to achieve a smooth consistency since these product options don’t usually contain stabilizers as an ingredient, enabling them to melt much better into a smooth consistency without the aid of oil.
- Use Tweezers. Using a pair of clean craft tweezers will make it much easier to apply any decorative edible pearls or sprinkles. It’s also a great way to ensure a precise placement of the edible decoration but this is totally optional.
- Sprinkles!! While you could leave your chocolate coated Oreos plain, if you do add sprinkles, make sure to do so when the chocolate is still wet so that they have a chance to stick adequately to the Oreos.
- High-quality Chocolate. Always use a high quality chocolate when coating your Oreos. This can apply to any chocolate-covered treat. You will always get smoother melted chocolate results when using a good quality chocolate!
- Chocolate Melting Method. I prefer melting chocolate over a double boiler since microwaving chocolate (although still an option) has a greater risk of burning chocolate and once burnt, there’s no going back – you’ll have to throw the chocolate away and start from the beginning.
- Leftover Chocolate. If you have any leftover melted chocolate, store it in the refrigerator in an airtight container. It can be melted again using the double boiler method when you want to make an extra batch of these Valentine’s Day chocolate covered Oreos or to coat or decorate other sweet treats.

Recipe Variations
- Use Golden Oreos instead of the Original chocolate Oreos if you want a golden center.
- Double Stuffed Oreos can also be used for making these Valentine’s Day chocolate covered Oreos.
- Look out for limited edition Oreo cookies when leading up to any annual holiday or celebration – you’ll be surprised to see what fun and theme-appropriate products are brought out to the marketplace during these times.
- Instead of drizzling additional chocolate on the chocolate covered Oreos, consider sprinkling on some colored sanding sugar. This should be done before chilling the freshly coated Oreos though so that it adheres well.
- Insert some wooden popsicle sticks in the white cookie sandwich stuffing prior to coating the Oreos in chocolate. The stick can be secured in place with some melted chocolate. Turning these Valentine’s Day chocolate covered Oreos into popsicle treats will allow you to display them in a jar or a decorated styrofoam base – they’ll make a lovely display for any Valentine’s-themed party!
- I haven’t added any food flavoring to the melted chocolate but you could add in some vanilla or almond extract if you like or even a strawberry food flavoring to stick to the theme of Valentine’s Day!
What To Serve With Chocolate Dipped Oreos
While these Valentine’s Day Chocolate Covered Oreos can be served and enjoyed as is, or with a nice cold glass of milk. You could also add them to a Valentine’s-themed dessert platter with other delicious treats.
Valentine’s Day chocolate-covered Oreos can also be enjoyed with a scoop of ice cream or even used to decorate larger desserts such as a cute decorative garnish to a frosted cake!
Frequently Asked Questions (FAQS)
HOW SHOULD I STORE LEFTOVER VALENTINE’S DAY CHOCOLATE COVERED OREOS?
Whether you are making these Valentine’s Day chocolate covered Oreos ahead of time or have any leftovers, you have 3 options for storage:
At Room Temperature: These chocolate-covered Oreos can be stored at room temperature in an airtight container for up to 1-2 weeks. If your environment is somewhat warm or humid then rather store them in the refrigerator so that they don’t spoil.
Refrigerator: Store your chocolate-covered Oreos in an airtight container in the refrigerator for up to 3 weeks.
Freezer: Store your treats in an airtight container in the freezer for up to 2 months. You can then allow them to soften slightly in the refrigerator before serving. If your decorative sprinkles slide off, stick them back on with some extra melted chocolate.
IS IT NECESSARY TO ADD OIL TO THE MELTED CHOCOLATE?
Melted chocolate chips can sometimes form lumps and bumps due to stabilizer ingredients found in most brands. The addition of oil helps to smooth out the melted chocolate so that you get a lump-free consistency, perfect for coating treats such as these Valentine’s Day chocolate-covered Oreos!
You can use vegetable oil or another flavorless oil such as canola oil or unscented coconut oil.
In cases where you have used candy melts or wafers, it’s unlikely that you’ll need to add in any oil since these melt smoothly.
CAN I MAKE VALENTINE’S DAY CHOCOLATE COVERED OREOS AHEAD OF TIME?
Yes, you can. As mentioned with the storage of these treats, you could make and store these chocolate-covered Oreos at room temperature or in the refrigerator a week or two prior to serving.
I don’t recommend making these treats so far in advance that you find yourself forced to freeze them and the reason for this is because chocolate in freezer storage can potentially discolor which isn’t great for presentation when it comes to serving these treats for the first time. In addition to this, the added decorative sprinkles may bleed color when your frozen chocolate covered Oreos are thawed. Only freeze leftover chocolate covered Oreos.
More Oreo Recipes You’ll Love
If you like this recipe or make this recipe, be sure to leave a comment, rate the recipe, and follow us on:
Facebook | Twitter | Pinterest | BlogLovin | Instagram
Recipe
Chocolate Dipped Oreos Recipe
Ingredients
- 20 Oreos any flavor
- 10 ounces white chocolate chips (or candy melts different color)
- Food coloring
- 1 cup sprinkles of choice
Instructions
Melt the chocolate. (Choose ONE option, whichever you prefer.)
- Option 1: Double boiler method. Fill a small or medium pan with one or two inches of warm water.Bring it to simmer over medium heat, and once water is heated through and steam released add the bowl on top. NOTE: The glass bowl should not get in contact with water. Add in the chocolate chips and stir constantly until about 70% of the chips are melted. Remove from the heat and continue to stir with a spatula until everything has melted and smooth.
- Option 2: Microwave Method. Place the candy melts in a small bowl and microwave for 30 second intervals until the chocolate is melted.
Color The Chocolate
- Divide melted chocolate into two or more bowls if you are going to be using different colors.
- Add desired food coloring to one bowl according to packaging instructions.
- Alternatively, you can use colored candy melts and melt them the same way as described above.
- For a very smooth consistency add a drizzle of coconut or olive oil to the melting chocolate.
Dip the Oreos in Chocolate
- Using two forks, dip each Oreos into the chocolate.
Decorate The Cookies
- Carefully transfer the cookies to a cooling rack or parchment paper.
- Decorate the cookies by adding sprinkles, and/or candies, or drizzle with colored chocolate.
Chill The Cookies
- Let the cookies cool for a couple of minutes and then refrigerate for 30 minutes or until chocolate is set.
Notes
Recipe Tips:
- Thin Out The Chocolate. If your melted chocolate looks and feels too thick, simply stir in 1 teaspoon of vegetable oil or coconut oil. Both are good options since they are flavorless.
- Candy Melts or Chocolate Wafers. White almond bark, candy melts or Ghirardelli white chocolate wafers can be used for coating these chocolate covered oreos instead of chocolate chips. If you do use candy melts or wafers, it’s unlikely that you will need to add in any oil while melting the chocolate to achieve a smooth consistency since these product options don’t usually contain stabilizers as an ingredient, enabling them to melt much better into a smooth consistency without the aid of oil.
- Use Tweezers. Using a pair of clean craft tweezers will make it much easier to apply any decorative edible pearls or sprinkles. It’s also a great way to ensure a precise placement of the edible decoration but this is totally optional.
- Sprinkles!! While you could leave your chocolate coated Oreos plain, if you do add sprinkles, make sure to do so when the chocolate is still wet so that they have a chance to stick adequately to the Oreos.
- High-quality Chocolate. Always use a high quality chocolate when coating your Oreos. This can apply to any chocolate-covered treat. You will always get smoother melted chocolate results when using a good quality chocolate!
- Chocolate Melting Method. I prefer melting chocolate over a double boiler since microwaving chocolate (although still an option) has a greater risk of burning chocolate and once burnt, there’s no going back – you’ll have to throw the chocolate away and start from the beginning.
- Leftover Chocolate. If you have any leftover melted chocolate, store it in the refrigerator in an airtight container. It can be melted again using the double boiler method when you want to make an extra batch of these Valentine’s Day chocolate covered Oreos or to coat or decorate other sweet treats.




Andrea says
Super fun and festive! The grandkids are going to love making these!
Holley says
My kids are going to LOVE making these with me for Valentine’s Day! So much fun!
Toni says
These were so good! My kids couldn’t stop eating these delicious treats!