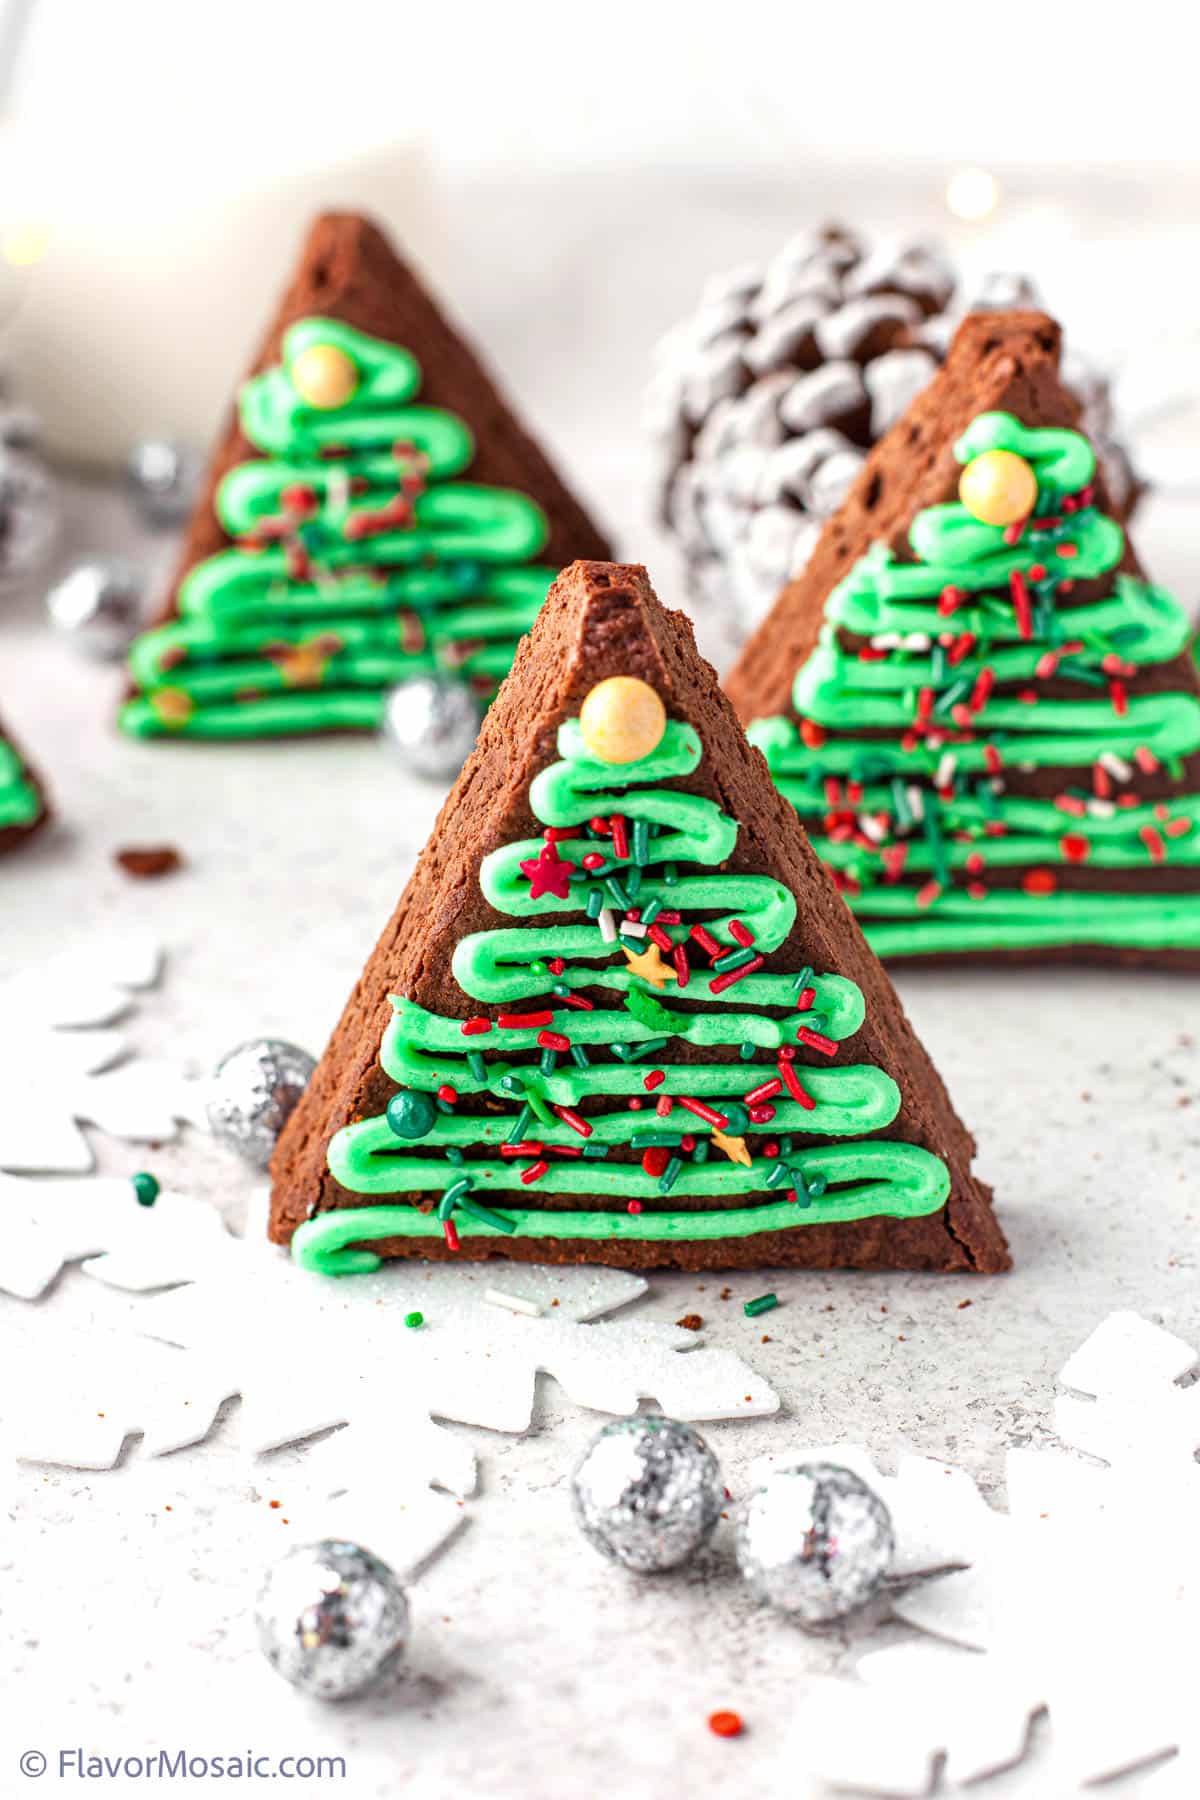
Christmas Tree Brownies are delicious and festive homemade treats that are perfect for the holiday season!
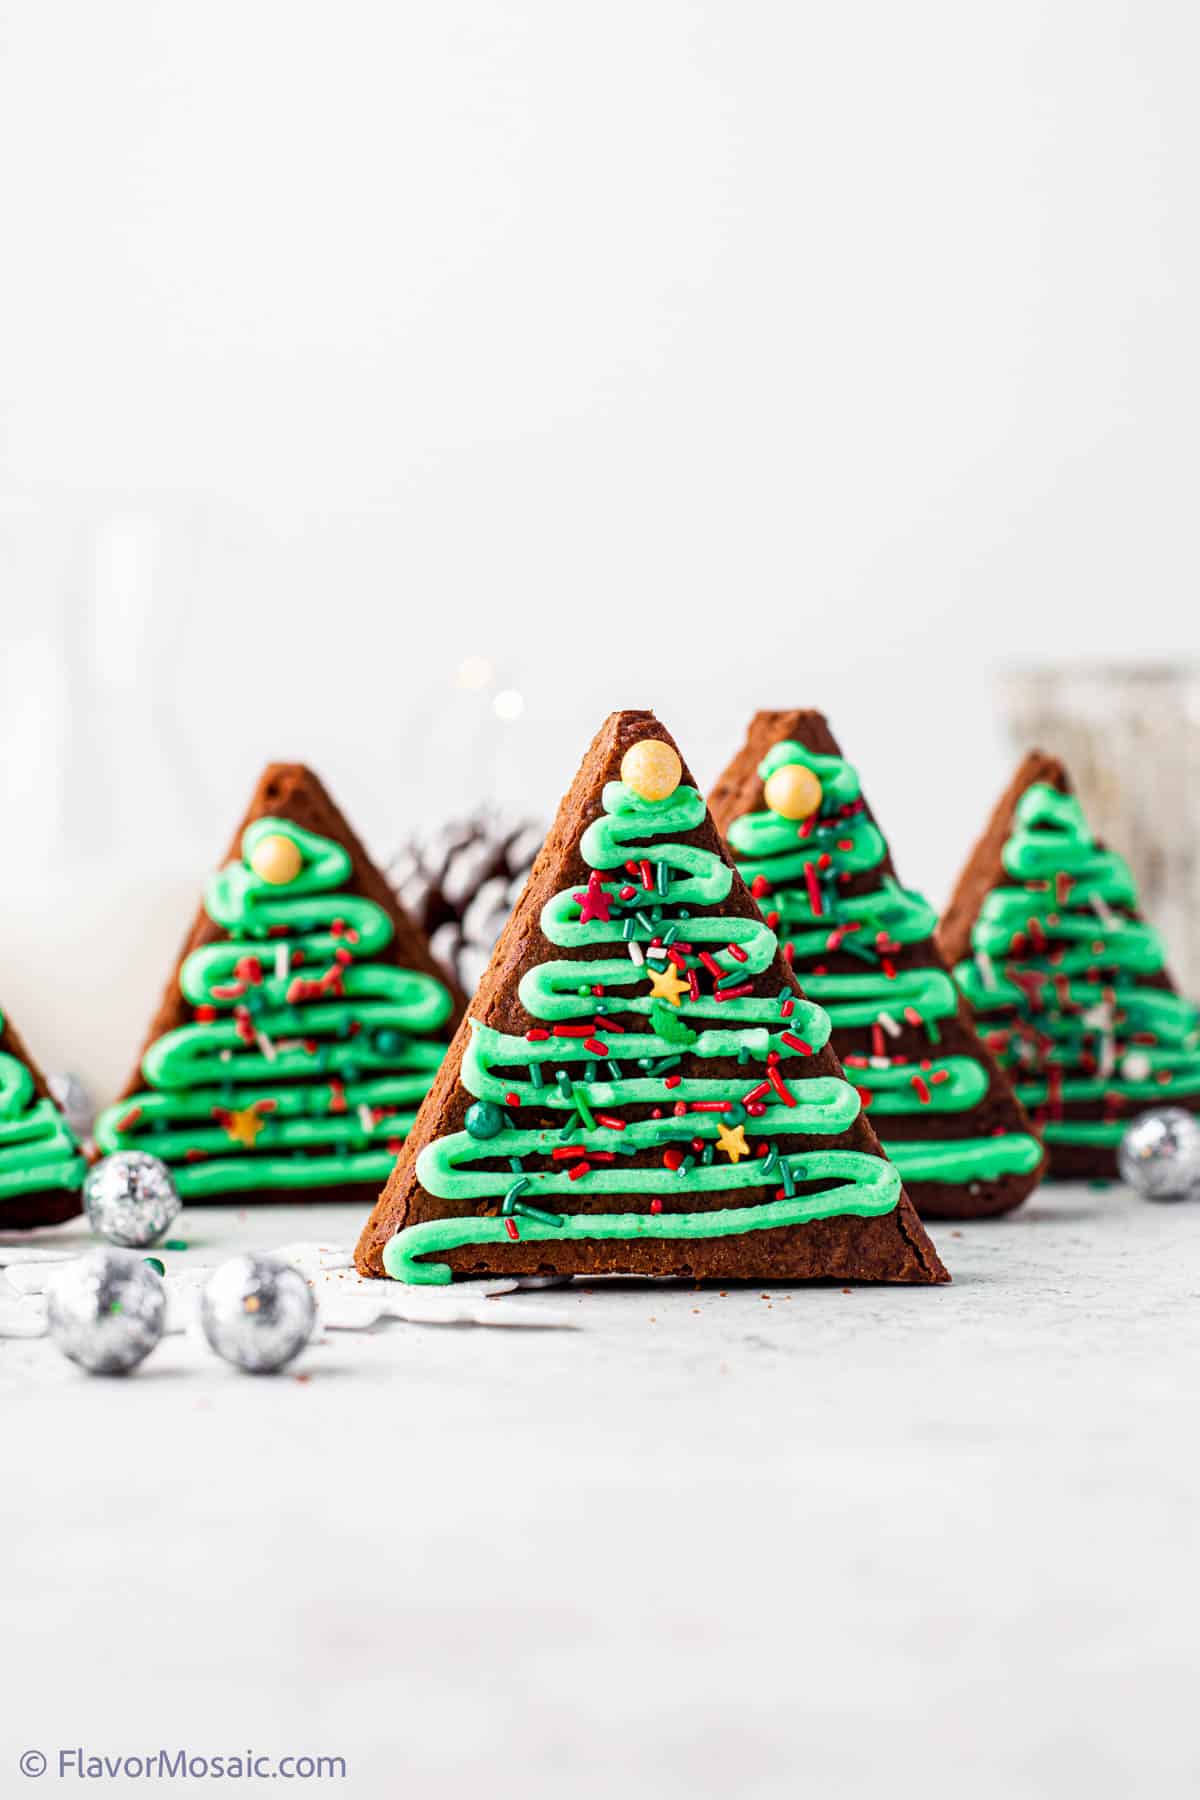
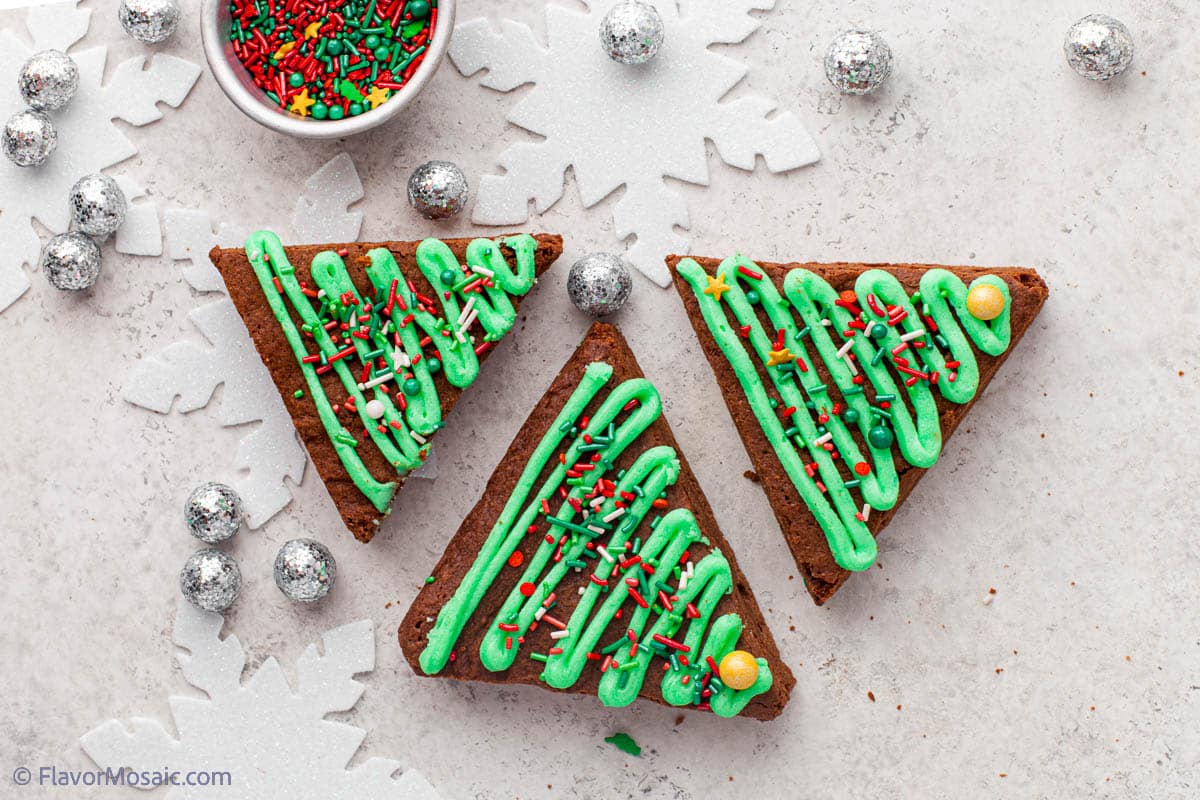
The rich chocolate brownie base is sliced into tree-shaped triangles, frosted with vibrant green buttercream icing, and topped with colorful sprinkles with an optional candy cane tree trunk.
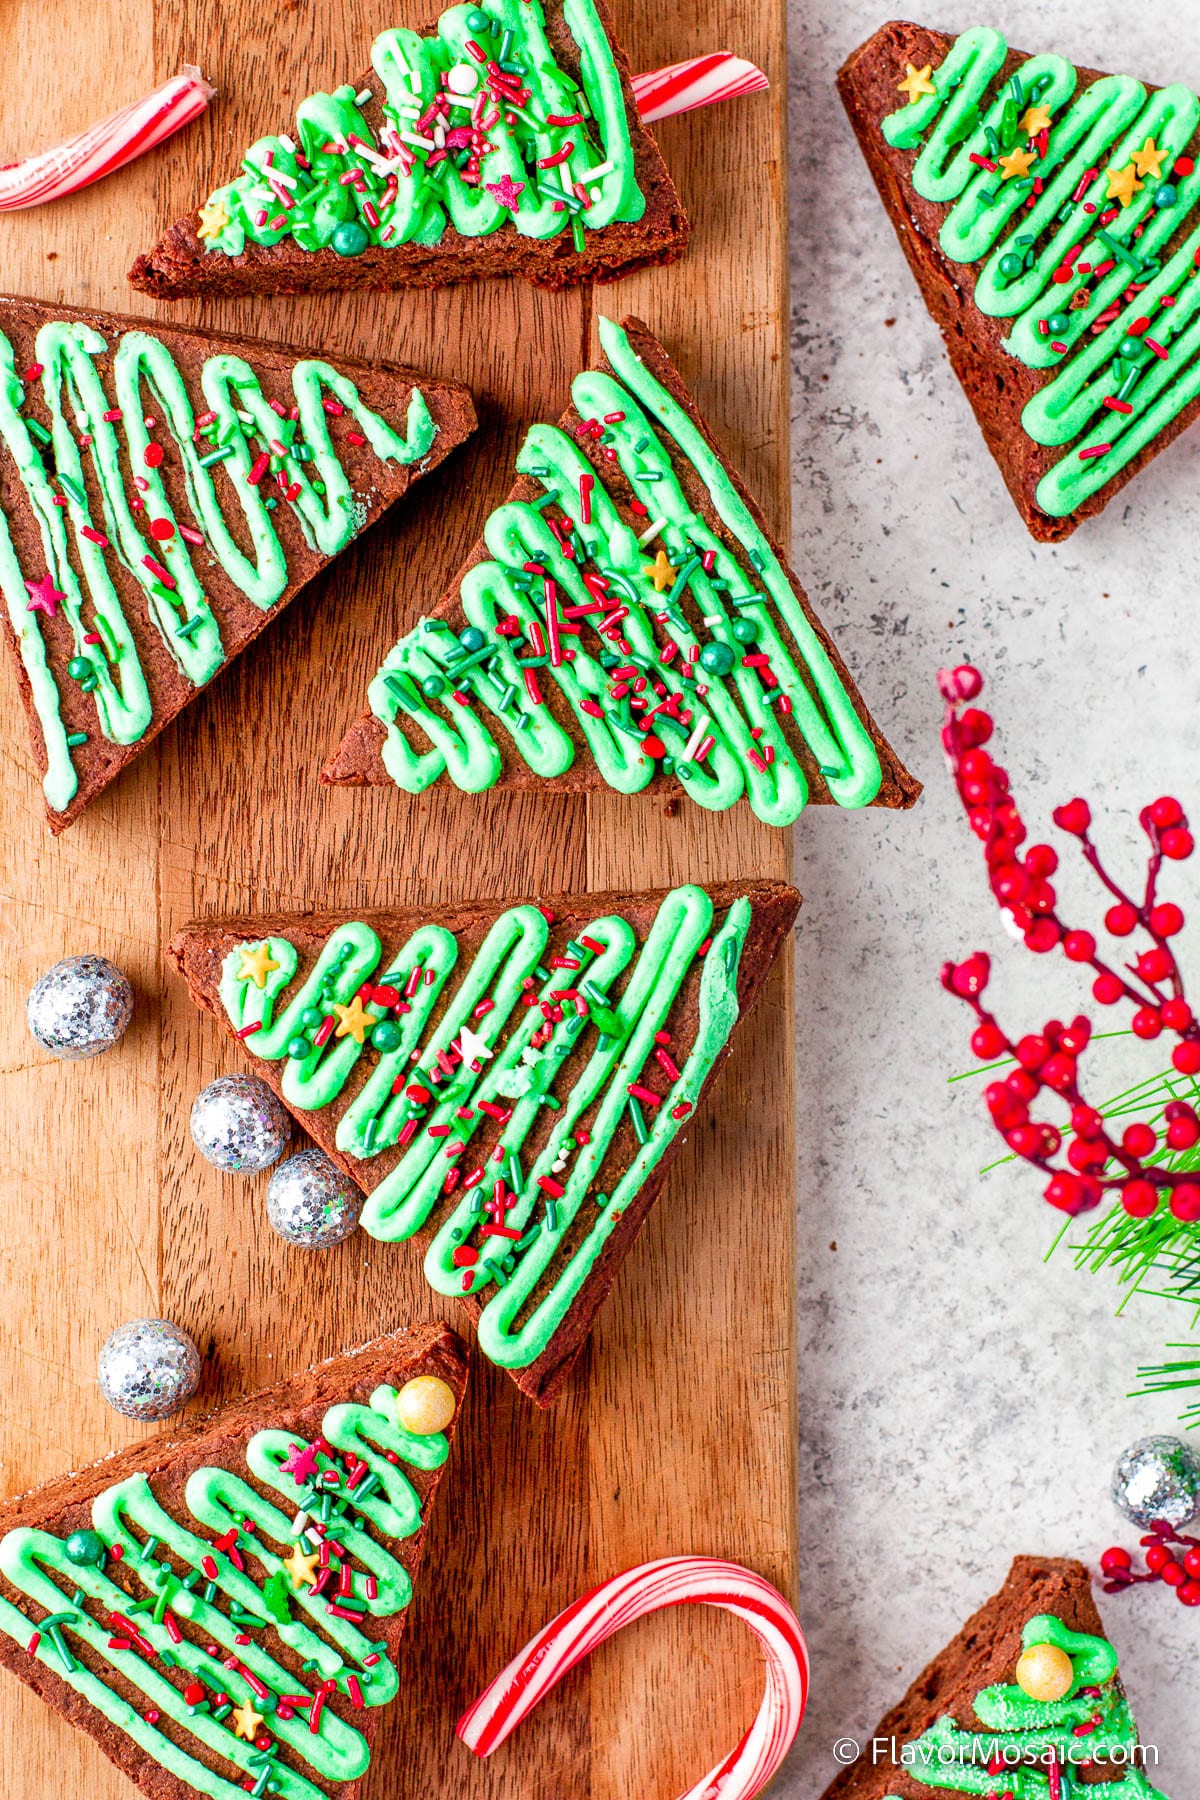
Get the kids involved to help you decorate these Christmas Tree Brownies and serve them alongside other holiday treats for friends and family to enjoy!
These Copycat Little Debbie Christmas Tree Brownies are fun to make and taste even better than the original!
These adorable Christmas tree brownies are perfect for a cookie exchange or a Christmas party, with other cookies like Chocolate Crinkle Cookies, Snowballs, Gingerbread Cookies, and Molasses Crinkle Cookies. It’s a great way to get into the holiday spirit.
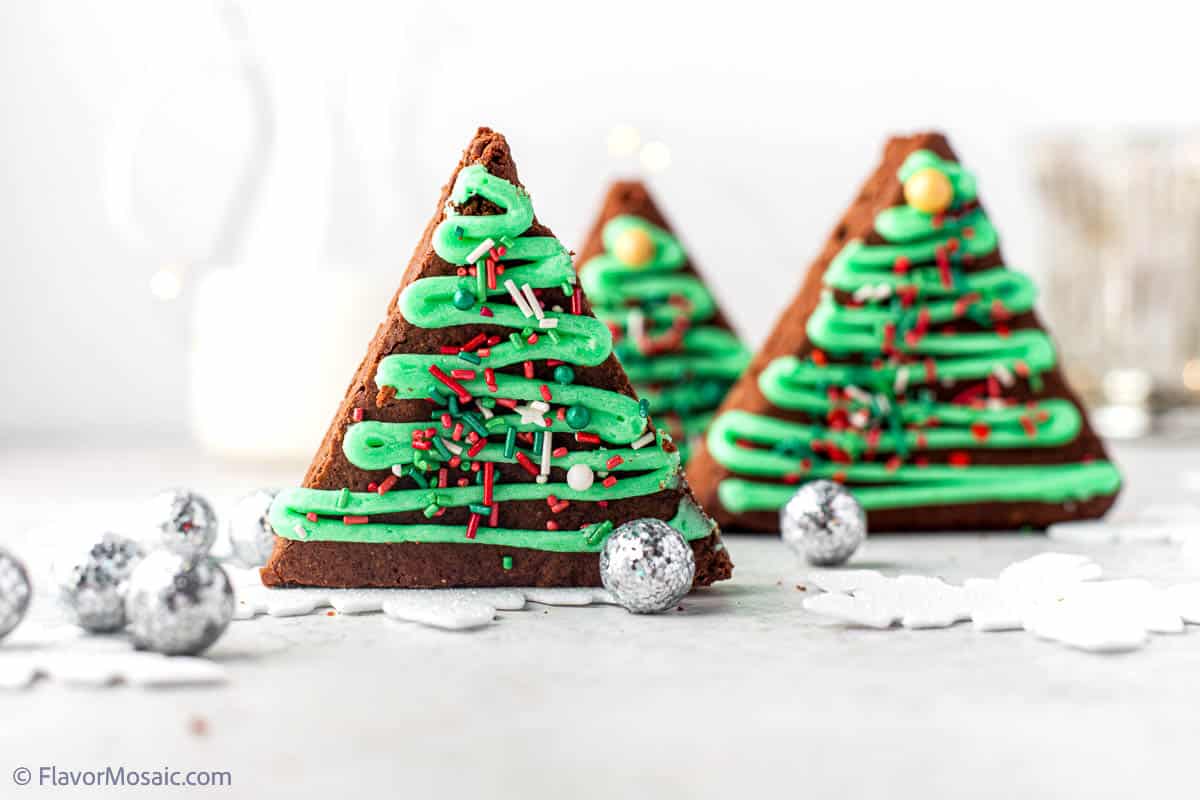
Table of Contents
Why You’ll Love These Brownies
- Easy. These Christmas Tree Brownies are straightforward to assemble – a regular brownie base with decorative icing.
- Make Ahead. Make the brownie base a day or two ahead of time until ready to assemble with the buttercream frosting and sprinkles to serve.
- Customize. Easily adapt these homemade brownies with additional ingredient add-ins or swaps to better suit your dessert preferences or to match a specific holiday and theme.
- Cookie Exchange. These adorable Christmas tree brownies are a delicious alternative to holiday cookies that you can make for cookie exchange parties.
What You’ll Need
Equipment
The affiliate links below will allow you to see the product on Amazon.com. If you purchase one of the items, I will receive a very small commission on the product, which does not increase the price.
Ingredients
Below, I discuss the ingredients and possible substitutions if you don’t have a specific ingredient. However, if you are looking for the specific measurements of each ingredient, scroll down to the bottom of this article, just above the comments, for the printable recipe card, which includes all the ingredients and the specific amounts of each one.
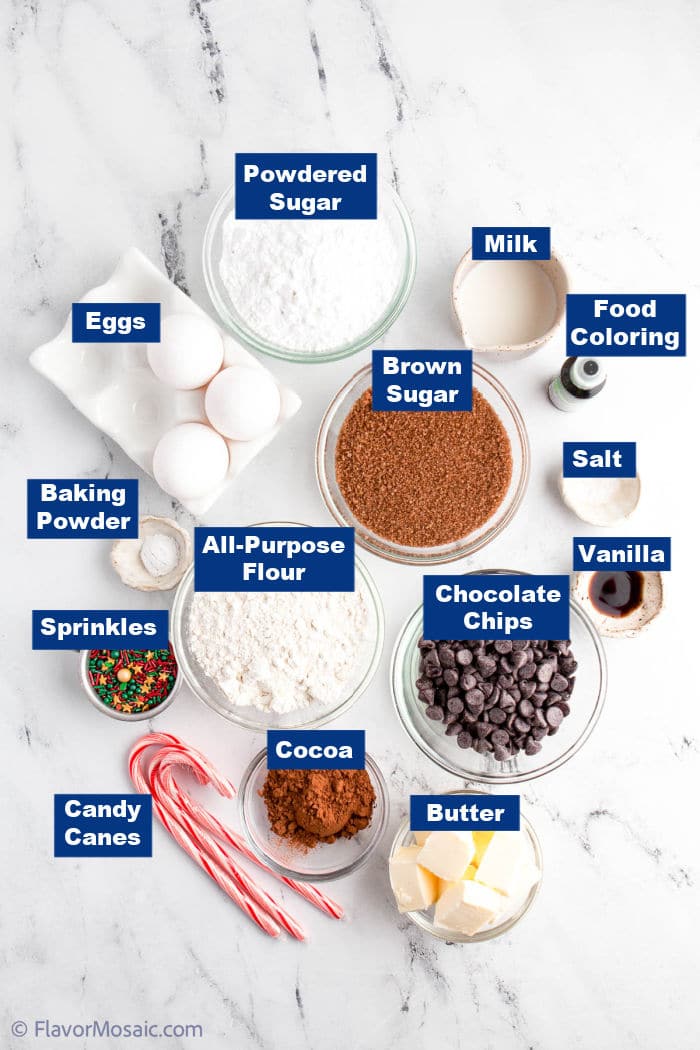
- Butter – I haven’t specified whether to use salted or unsalted butter, but if you opt for salted butter, then the salt listed in the recipe ingredients for the brownie batter can be omitted.
- Semi-sweet chocolate chips – These are combined with butter and melted down to mix into the brownie batter. You could use a semi-sweet baking bar for the melted chocolate and include semi-sweet chocolate chips into the batter afterward for additional chocolate flavor and texture.
- Cocoa powder – The brownie batter with the buttercream is already quite sweet, so I have used unsweetened cocoa powder.
- Brown Sugar – Brown sugar provides an additional depth of flavor to the brownie batter, resulting in chewy brownies. Light brown sugar or darker brown sugar can be used.
- Eggs – Allow the eggs to sit at room temperature before mixing them into the brownie batter ingredients.
- Vanilla extract – I use high-quality vanilla extract in all my sweet treats for the best flavor.
- All-purpose flour – If you need gluten-free brownies, then use gluten-free flour, like King Arthur gluten-free flour, which is an easy measure-for-measure substitution.
- Salt – A small amount of salt helps to enhance the chocolate flavor in these Christmas brownies.
- Baking powder – Check the expiration date on baking powder to ensure that you get a good rise in the brownies.
- Powdered sugar – Be sure to carefully measure your powdered sugar because adding too much can cause an overly sweet green frosting topping. Sifting powdered sugar will ensure an ultra-smooth texture, but this is optional.
- Milk – Whole milk adds flavor to the buttercream. Like eggs, allow the milk to reach room temperature before mixing it with the rest of the buttercream ingredients. Add ½ – 1 Tablespoon extra milk for softer icing.
- Green food coloring – Use high-quality food coloring for the icing, especially when preparing these brownies for a Christmas party.
- Christmas sprinkles – Make these edible Christmas trees pop with color by adding your favorite holiday sprinkles while the buttercream is still slightly wet.
- Candy canes – These are optional and can be used as a tree trunk for each assembled brownie.
Directions
Melt The Butter and Chocolate
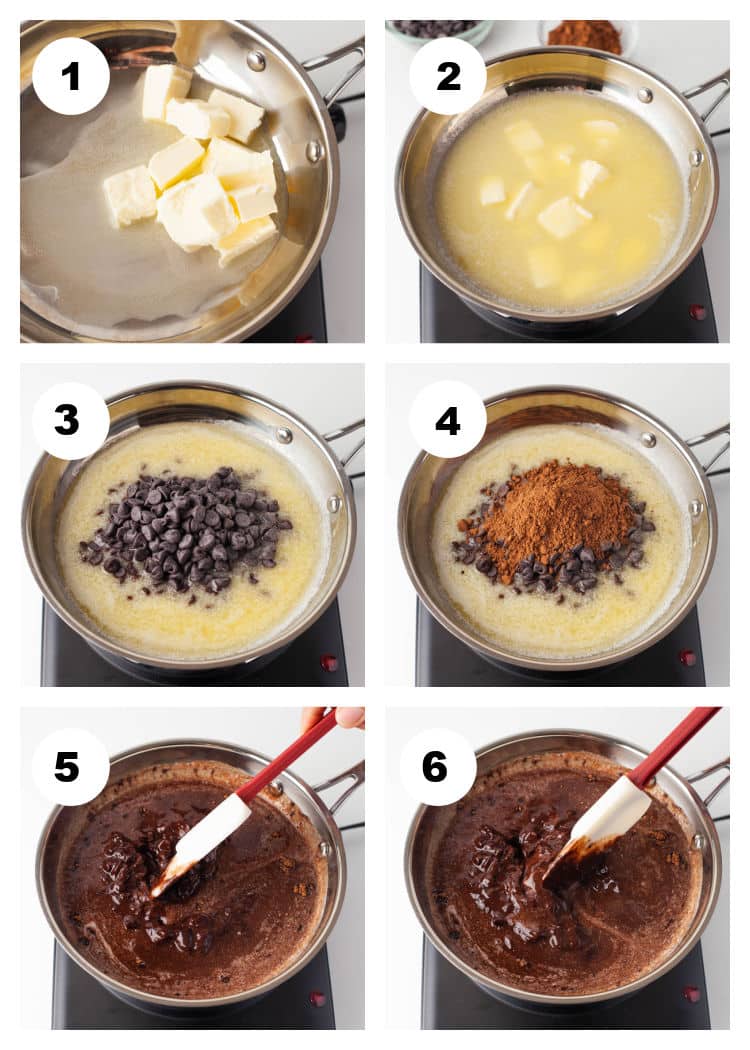
- Preheat the oven to 350 degrees. Grease and flour an 8-inch square pan.
- In a saucepan, melt the butter.
- Add the chocolate chips.
- Add the cocoa powder.
- Mix until combined.
- Make sure that the chocolate is perfectly melted.
Make The Brownie Batter
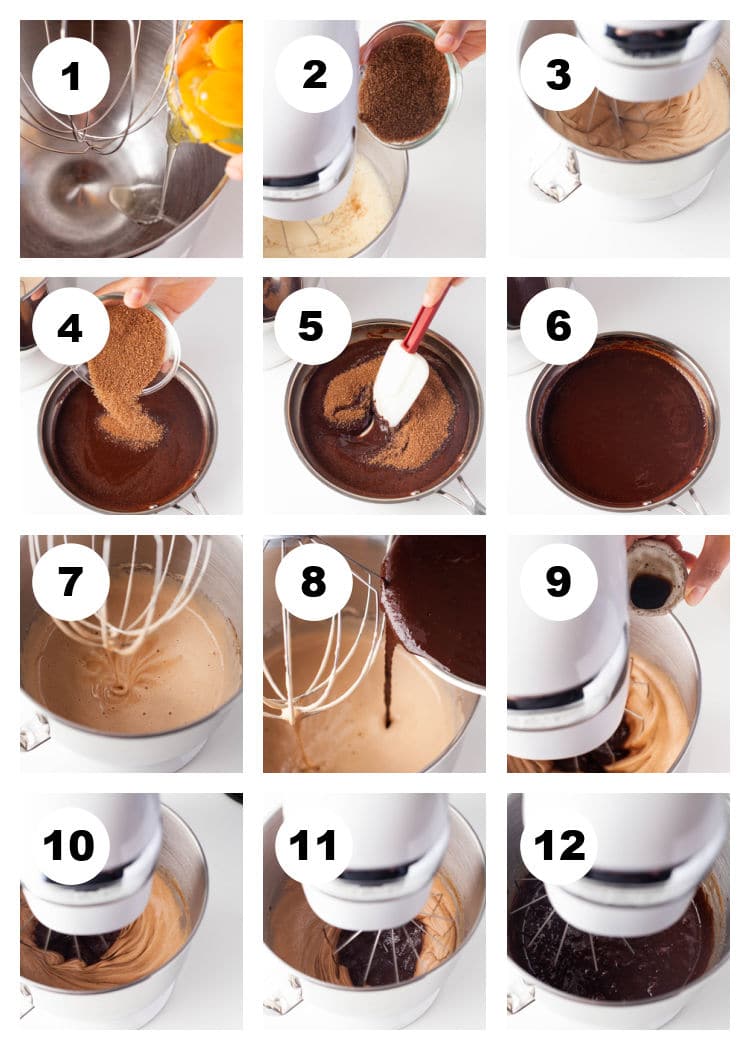
- In a standing mixer, mix the eggs until they are light and fluffy.
- Begin to add the sugar little by little. It is very important that before you add anything else, you have to let them rise until the eggs and sugar look pale yellow.
- Add some of the sugar mixture to the chocolate so it cools off.
- Once it is at room temperature, add the chocolate mixture to the standing mixer bowl with the rest of the sugar and eggs. Mix until combined.
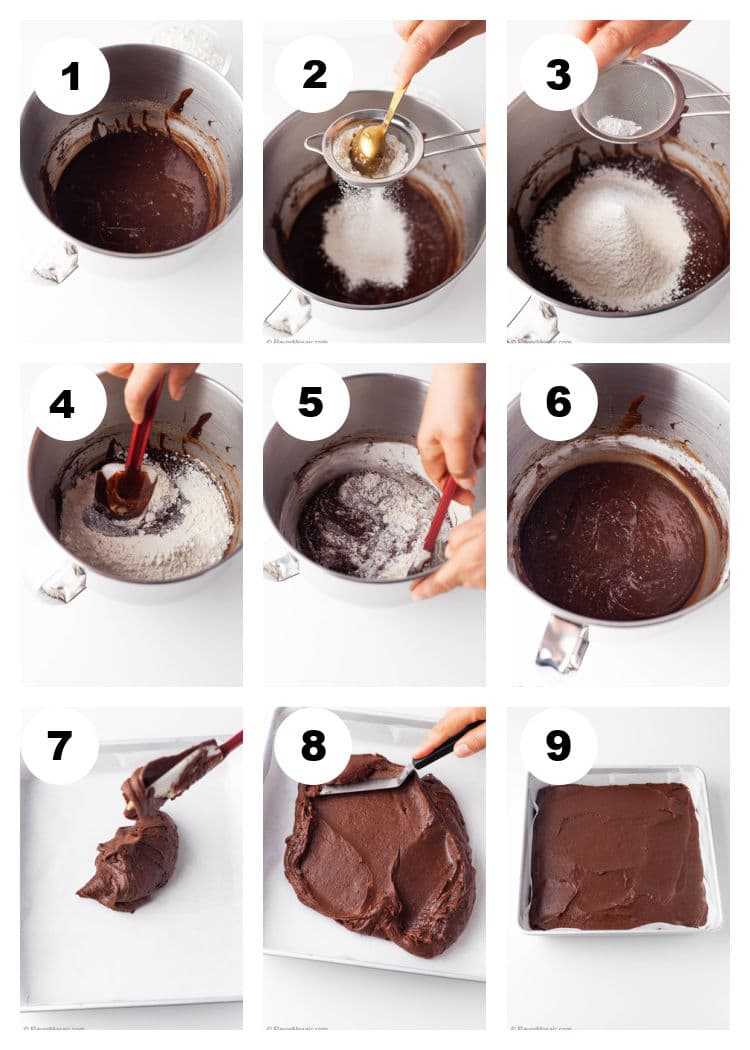
- Sift the flour into the mixture and mix until combined. Do NOT overmix. You can also mix it manually instead of using the standing mixer.
How To Bake Christmas Tree Brownies
- Pour the batter into your lined baking pan.
- Bake the brownies in a preheated 350° F. oven for 20 – 25 minutes or until the texture does not bounce and it doesn’t look shiny anymore. Do not overcook.
- Allow them to cool for 10 minutes before removing the brownies from the pan.
- Once baked, allow the brownies to cool completely until they reach room temperature.
Make The Buttercream Icing
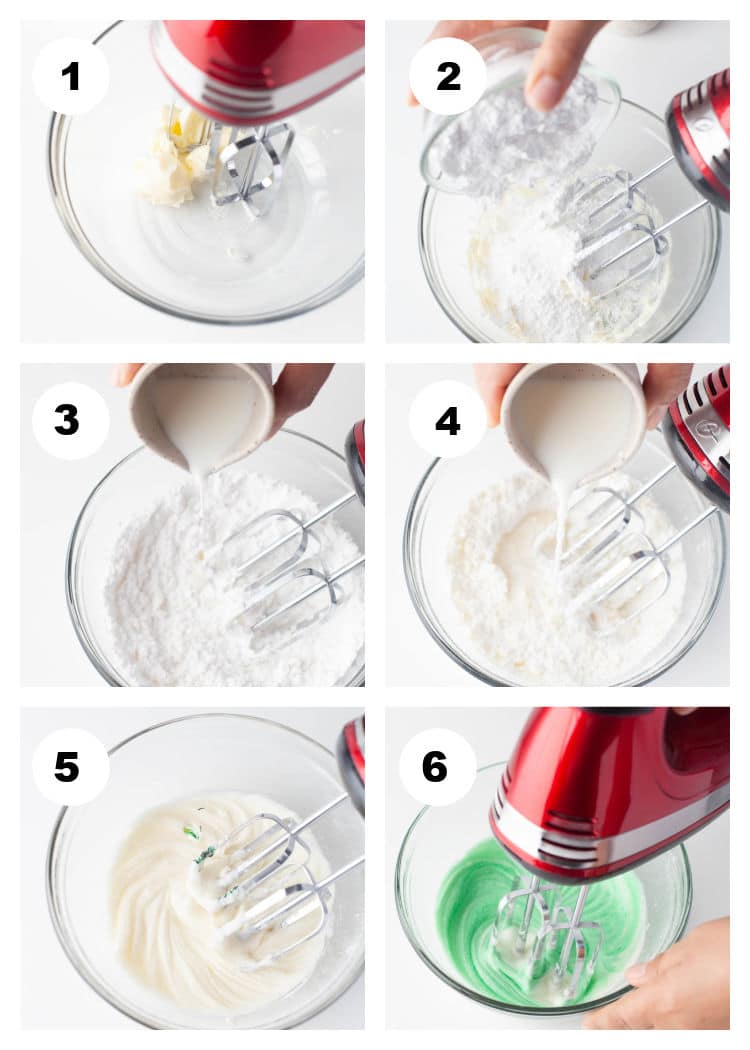
- Prepare your buttercream frosting by beating the butter with a hand mixer until light and fluffy.
- Add the powdered sugar little by little until fully combined.
- Add the milk.
- Mix until combined.
- Add the green food coloring. (You can add a teaspoon of peppermint extract or vanilla extract if you want the frosting to have a hint of flavor)
- Mix until the green color is spread evening throughout the frosting.
How To Cut Christmas Tree Brownies
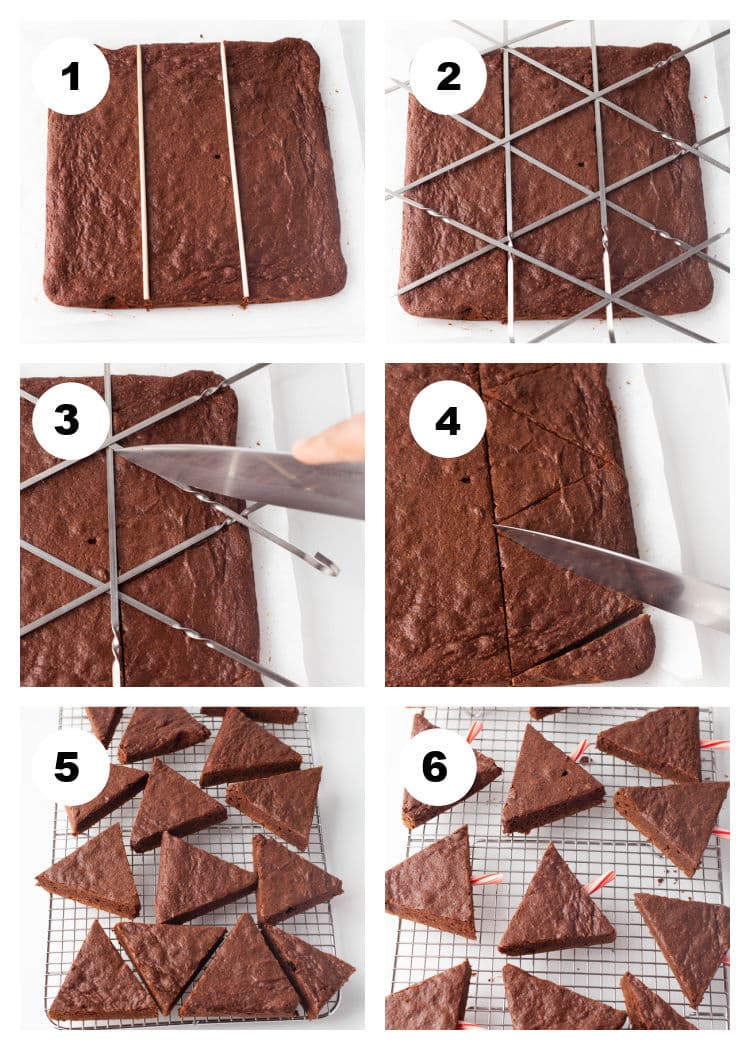
- Remove the cooled brownies from the pan.
- Cut the brownies into triangles.
- There should be three rows.
- 4 large triangles per row. So they are even, and you will have some edges that would work for smaller trees.
- This recipe will make 12 large brownie trees.
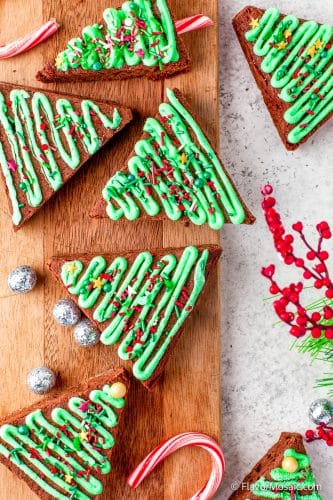
- If you are using candy canes, unwrap each one and, with a knife, cut some 1.5-inch long pieces. Press the sharper ends of the candy cane into the bottom of the tree.
How To Decorate Christmas Tree Brownies
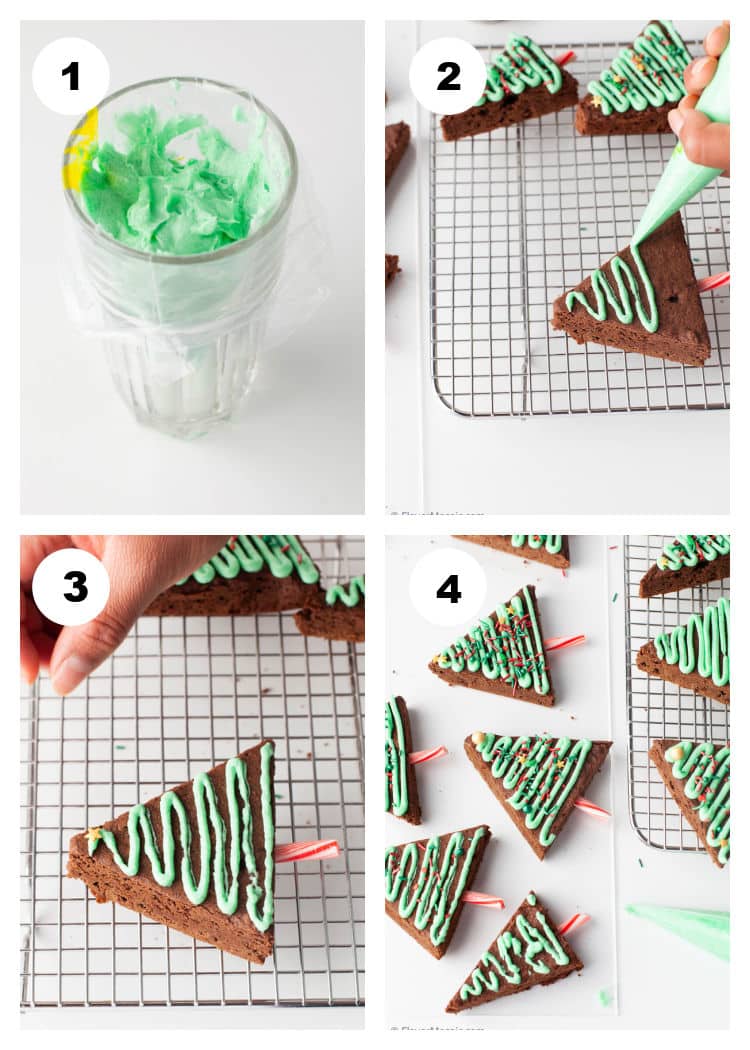
- Add your favorite Christmas sprinkles to your buttercream frosting, and enjoy!
- Put some frosting in your piping bag to decorate your brownies. If you don’t have a piping bag, spread the buttercream frosting with a spatula over each brownie.
- Use a piping bag starting at the top of the tree; gently squeeze your piping bag to make a zigzag from the top to the bottom of the tree.
- Top with sprinkles. Let the frosting firm up before serving.
Pro Tips
- Cool. Allow your baked brownies to cool before adding the buttercream; otherwise, your topping may melt.
- Pan Size. While I’ve used an 8-inch square baking pan, you could use larger prepared pans, but then you will end up with slightly thinner brownies, and the brownie base may need less baking time.
- Are Brownies Done? Use a food thermometer to check if your brownies are fully cooked. Insert the thermometer into the center of the brownies – it should read 165℉ for it to have been cooked through. If you don’t have a food thermometer, insert a toothpick into the center of the brownies. The toothpick should come out clean for the brownies to be baked sufficiently.
- Easy Clean-Up. Line the baking pan with parchment paper horizontally and vertically with edges hanging over the pan’s sides, making it easy to lift the baked brownies from the pan without the bottom of the brownies sticking.
- Butter Tips. While the butter must be at room temperature, it shouldn’t be overly soft when making the frosting; otherwise, the texture of the frosting could be compromised. The butter should be soft enough that it squishes slightly when pressed.
- Decorating Tip. After cutting the brownies, you will end up with leftover smaller edges that can be used and decorated as mini Christmas tree brownies to go with the larger brownies – that is, if you can resist eating the leftover pieces of brownies!
- Candy Cane Trunks. When using candy canes as the tree trunks for the holiday brownies, cut them approximately 1.5 inches. I’ve found this to be a proportional size.
- Boxed Mix Tip. If you use a boxed mix to make these brownies, check for the additional ingredients called for on the packaging, such as oil, milk, and eggs. It’s not guaranteed that every brand will call for the same additional ingredients to be added to the dry box mix.
Variations
- Blondies. Make tree shape blondies instead of brownies by omitting the unsweetened cocoa powder using white chocolate chips.
- Nutella. Add Nutella to these fun treats for a super decadent, chocolatey Christmas brownie.
- Additions. Add chocolate chips, dried fruit, or chopped nuts to the brownie batter.
- Shortcut Brownies. Use a brownie boxed mix instead of making them from scratch brownies.
- Candy Cane Tree Trunk. Insert candy canes into the bottom of each brownie for a candy cane trunk. Pretzel sticks can also be used, but only add them before serving these brownies; otherwise, they will soften.
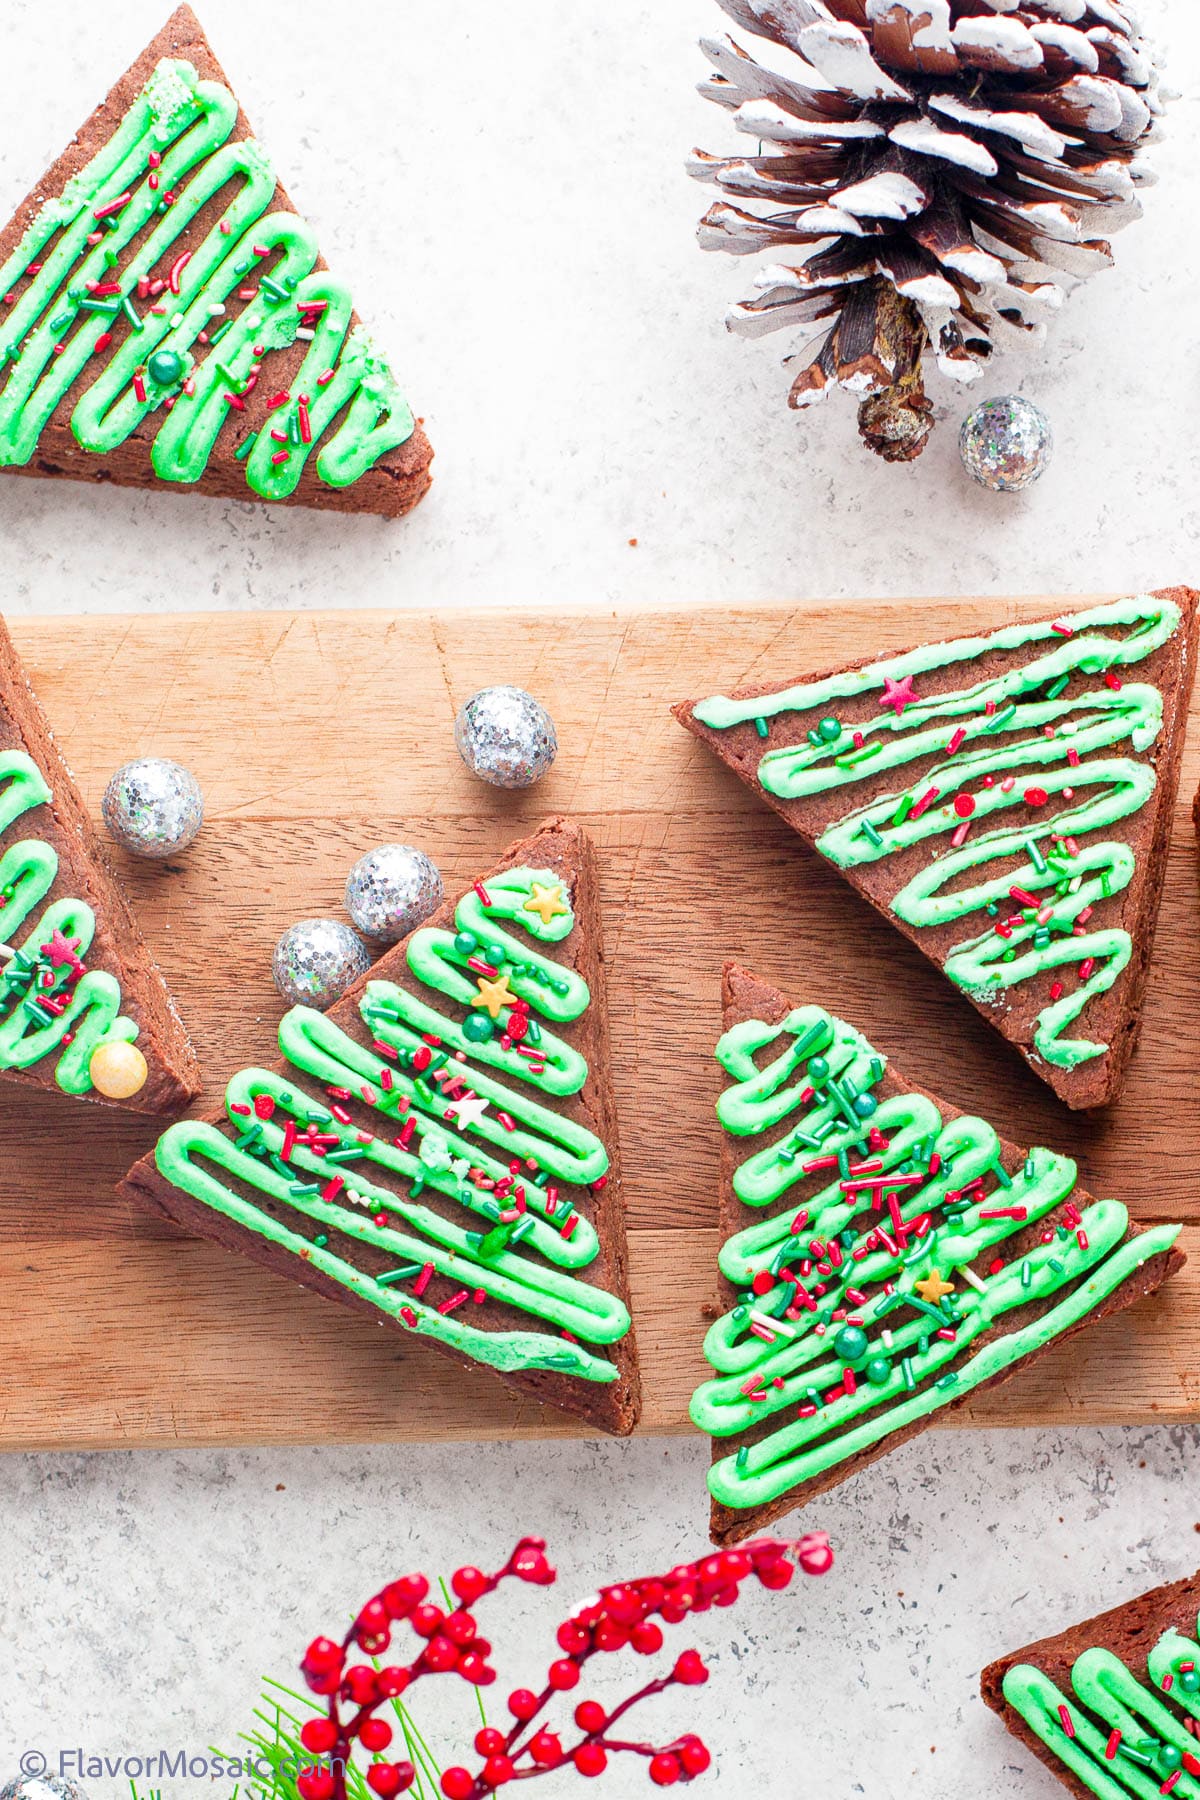
- Frosted Christmas Tree Brownies. Instead of piping the buttercream frosting in zig-zag patterns on the cut brownies, you can also spread the buttercream over the entire brownie and add sprinkles.
Serving Suggestions
Serve Christmas Tree Brownies with some of these great options!
- Whipped Cream
- Ice Cream – I like vanilla or Cookies and Cream Ice Cream.
- Hot Chocolate Dip
- Shortbread Chocolate Filled Christmas Cookies
- Mexican Wedding Cookies
- Christmas Shortbread Thumbprint Cookies
- Christmas Punch with Sherbet
FAQs
These Christmas tree brownies have become a favorite brownie recipe for the holidays. They consist of a rich chocolate brownie base cut into triangles to resemble the shape of a Christmas tree and then decorated with green-colored buttercream using a piping bag or pastry bag for easy and controlled frosting.
I’ve also added colorful holiday sprinkles to these brownies while the buttercream is still slightly wet, and candy canes or pretzel sticks can be inserted into the bottom of the Christmas brownies as tree trunks!
These holiday brownies can be stored in an airtight container at room temperature for 2-3 days or in the fridge for 4-5 days.
You could freeze your brownies for up to 1 month. It will be easier if you store these brownies in the baking pan used and then wrap the baking pan tightly in plastic wrap.
Alternatively, if you intend to store some leftover brownies that have already been removed from the baking pan, first flash freeze them and then wrap each brownie in plastic to store in an airtight container.
Thaw your frozen brownies in the refrigerator before serving.
If you like this recipe or make this recipe, be sure to leave a comment, rate the recipe, and follow us on:
Facebook | Twitter | Pinterest | BlogLovin | Instagram
Recipe
Christmas Tree Brownies Recipe
Ingredients
Brownies
- 10 tablespoons butter (1 stick + 2 tablespoons) or 140 grams
- ¾ cup semi sweet chocolate chips
- 2 Tablespoons unsweetened cocoa
- 1 cup brown sugar
- 3 small eggs
- ½ teaspoon pure vanilla extract
- 1 cup all-purpose flour
- 1 pinch salt
- ½ teaspoon baking powder
Icing
- 1 cup powdered sugar
- 4 Tablespoons butter
- 1 Tablespoon milk at room temperature you can add ½ to 1 Tablespoon extra if you want it a bit softer.
- Green food coloring
- Christmas Sprinkles
- Optional:Candy canes about 5 – 6 for the tree trunks
Instructions
Brownies
- Preheat the oven to 350 degrees. Grease and flour an 8-inch square pan.
- In a saucepan , melt the butter. Add the chocolate chips and cocoa powder. Mix until combined and the chocolate is perfectly melted.
- In a standing mixer, mix the eggs until they are light and fluffy. Begin to add the sugar little by little. It is very important that before you add anything else, you have to let them rise until the eggs and sugar look pale yellow.
- Add some of the sugar mixture into the chocolate, so it cools off. Once it is at room temperature, add the chocolate mixture back into the standing mixer bowl with the rest of the sugar and eggs. Mix until combined.
- Sift the flour into the mixture and mix until combined. Do NOT over mix. You can also mix it manually instead of using the standing mixer.
- Pour the batter into your lined baking pan and bake in the oven for 20 – 25 minutes or until the texture does not bounce, and it doesn’t look shiny anymore. Do not overcook.
- Allow them to cool for 10 minutes before removing the brownies from the pan.
- Once baked, allow the brownies to cool completely until they reach room temperature. Remove the brownies from the pan and cut into triangles. There should be three rows, 4 large triangles per row, so they are even, and you will have some edges that would work for smaller trees. You will make 12 large brownie trees.
- If you are using candy canes, unwrap each one and with a knife cut some 1.5 inch long pieces. Press the sharper ends of the candy cane into the bottom of the tree.
- Meanwhile, prepare your buttercream frosting, and when it’s ready use a piping bag and starting at the top of the tree, gently squeeze your piping bag to make a zigzag from the top to bottom of the tree.
- Add your favorite Christmas sprinkles on top of your buttercream frosting and enjoy!
Buttercream Frosting
- Prepare your buttercream frosting by beating the butter with a hand mixer, until light and fluffy.
- Add the powdered sugar little by little until thoroughly combined. Add the milk and mix until combined. Then add the green food coloring and mix until you have the desired color that is spread throughout all of the frosting. (You can add a teaspoon of peppermint extract or vanilla extract if you want the frosting to have a hint of flavor)
- Put some frosting in your piping bag to decorate your brownies; if you don’t have a piping bag spread some of the buttercream frosting with a spatula over each brownie and top with sprinkles. Let the frosting firm up before serving.
Notes
- Cool. Allow your baked brownies to cool before adding the buttercream; otherwise, your topping may melt.
- Pan Size. While I’ve used an 8-inch square baking pan, you could use larger prepared pans, but then you will end up with slightly thinner brownies, and the brownie base may need less baking time.
- Are Brownies Done? Use a food thermometer to check if your brownies are fully cooked. Insert the thermometer into the center of the brownies – it should read 165℉ for it to have been cooked through. If you don’t have a food thermometer, insert a toothpick into the center of the brownies. The toothpick should come out clean for the brownies to be baked sufficiently.
- Easy Clean-Up. Line the baking pan with parchment paper horizontally and vertically with edges hanging over the pan’s sides, making it easy to lift the baked brownies from the pan without the bottom of the brownies sticking.
- Butter Tips. While the butter must be at room temperature, it shouldn’t be overly soft when making the frosting; otherwise, the texture of the frosting could be compromised. The butter should be soft enough that it squishes slightly when pressed.
- Decorating Tip. After cutting the brownies, you will end up with leftover smaller edges that can be used and decorated as mini Christmas tree brownies to go with the larger brownies – that is, if you can resist eating the leftover pieces of brownies!
- Candy Cane Trunks. When using candy canes as the tree trunks for the holiday brownies, cut them approximately 1.5 inches. I’ve found this to be a proportional size.
- Boxed Mix Tip. If you use a boxed mix to make these brownies, check for the additional ingredients called for on the packaging, such as oil, milk, and eggs. It’s not guaranteed that every brand will call for the same additional ingredients to be added to the dry box mix.


Comments
No Comments