A big part of any celebration is delicious food and what better way to celebrate the 4th of July than with a freshly baked and decorated batch of patriotic cupcakes!
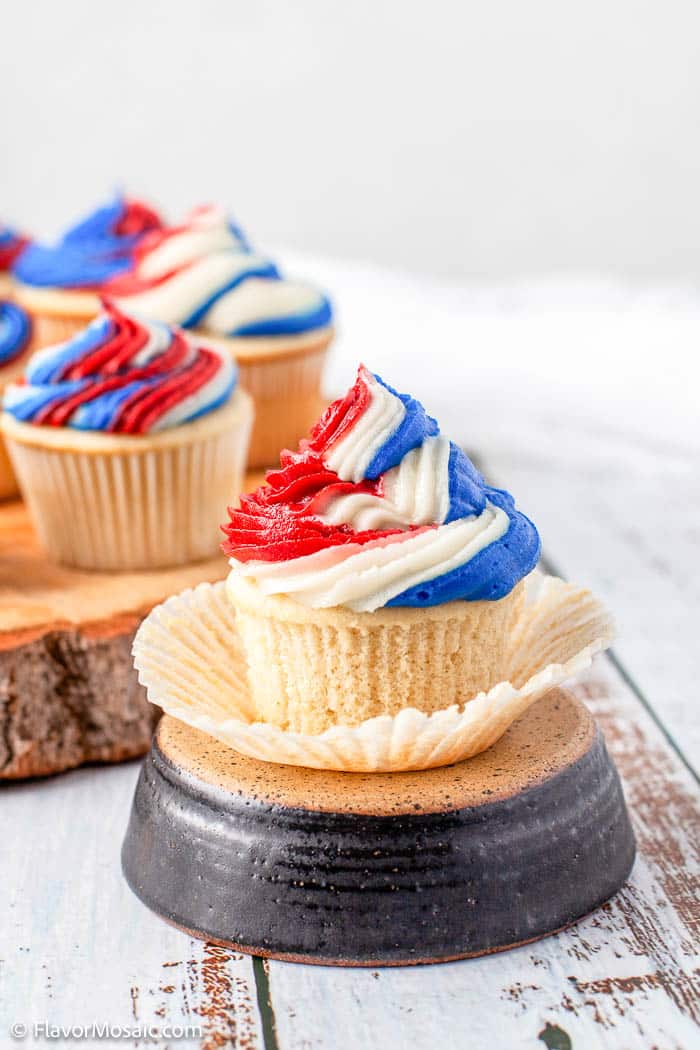
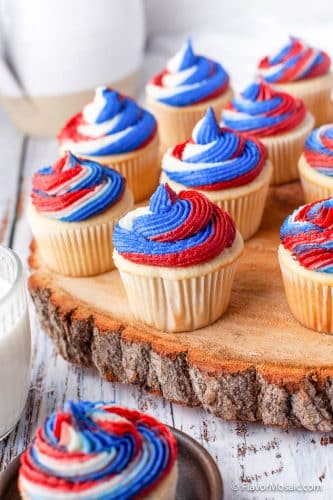
These July 4th White Chocolate Cupcakes with Red White and Blue Swirled Buttercream Frosting are no ordinary cupcakes.
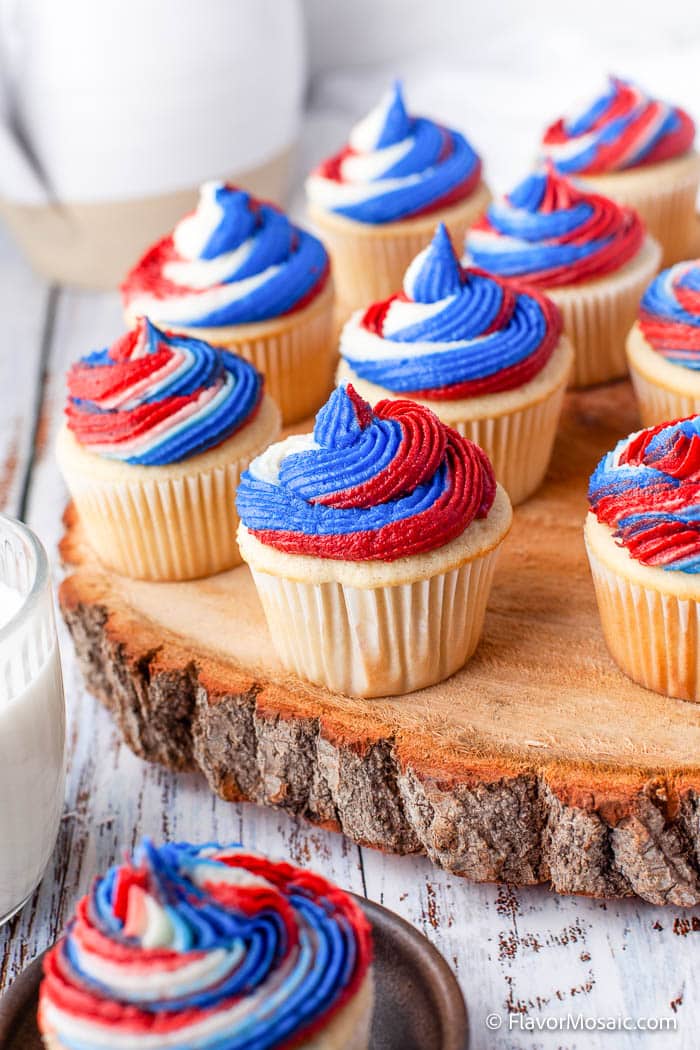
The batter is rich and loaded with flavor from the melted white chocolate while also light and fluffy thanks to the stiff egg whites and sugar mixture that gets gently folded in.
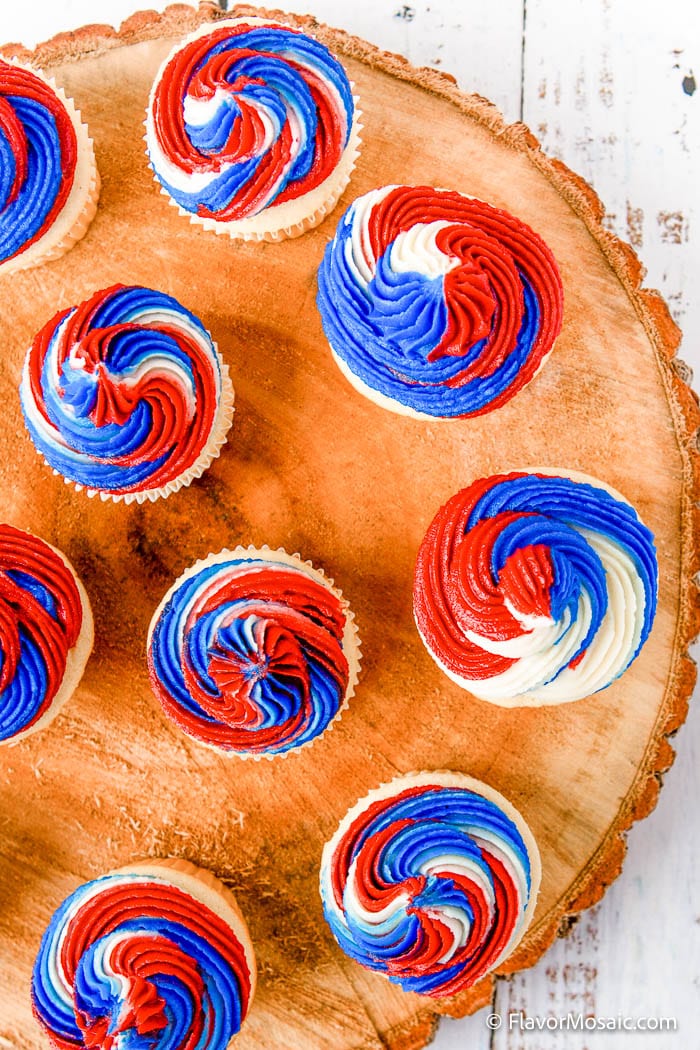
To top these scrumptious cupcakes, I’ve made a creamy buttercream that’s piped in red, blue, and white. Stunning and irresistibly good! It is perfect for Memorial Day, Flag Day, and July 4th Independence Day!
Table of Contents
- Why You’ll Love This Recipe
- Why This Recipe Works
- What Do I Need To Make These Cupcakes?
- Equipment
- Ingredients
- How To Make Red White And Blue Cupcakes
- Cupcake Instructions
- How To Make Buttercream Frosting
- How To Make Buttercream Frosting Red White and Blue
- Recipe Tips
- Recipe Variations
- What To Serve With 4th of July Cupcakes
- FAQs
- More Recipes
- Recipe
- Reviews
Why You’ll Love This Recipe
- These hand-held red white and blue dessert cupcakes are convenient for taking to July 4th picnics or parties!
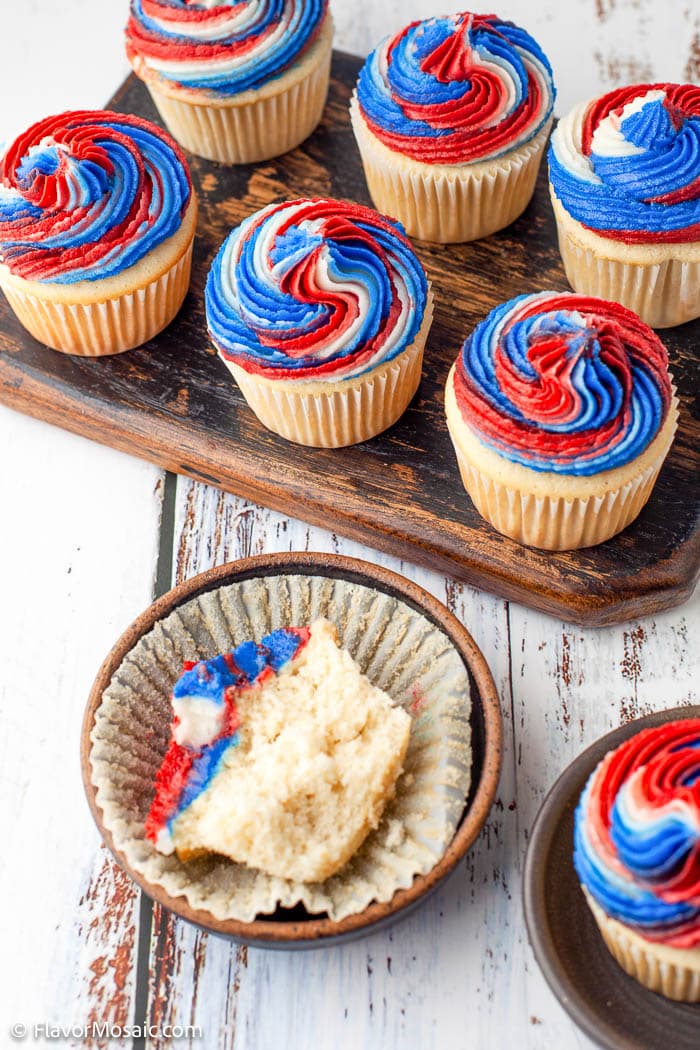
- July 4th white chocolate cupcakes with red, blue, and white buttercream are absolutely stunning! They’ll add a pop of patriotic color to your table decorations and get everyone in the mood to celebrate!
- The addition of melted white chocolate in the cupcake batter takes the flavor and texture of these holiday cupcakes to a whole new level of decadence.
Why This Recipe Works
- This is a tried and tested cupcake recipe, allowing me to guide you through simple and clear recipe instructions with corresponding in-process images so that you know exactly what to do at all times!
- Most of the recipe time is dedicated to the preparation of these cupcakes which gives you the opportunity to make the cupcake bases or the buttercream in advance to reduce overall time.
- Useful tips and frequently asked questions are added in this recipe post for further clarification, making the recipe a breeze to understand and follow.
- I’ve included a few ways that you could adapt these July 4th cupcakes with simple recipe substitutions and suggestions. If you have any of your own, make sure to share them with me in the comments section!
What Do I Need To Make These Cupcakes?
Equipment
The affiliate links below will allow you to see the product on Amazon.com. If you purchase one of the items, I will receive a very small commission on the product, which does not increase the price.
- Mixing Bowl Set
- Mixing Bowls – includes a small bowl, medium bowl, and large bowls.
- Hand Mixer
- Stand Mixer
- Measuring Cups
- Measuring Spoons
- Cupcake Pan
- Cupcake Liners
Ingredients
Below, I discuss the ingredients and possible substitutions if you don’t have a specific ingredient. However, if you are looking for the specific measurements of each ingredient, scroll down to the bottom of this article, just above the comments, for the printable recipe card, which includes all the ingredients and the specific amounts of each one.
CUPCAKES
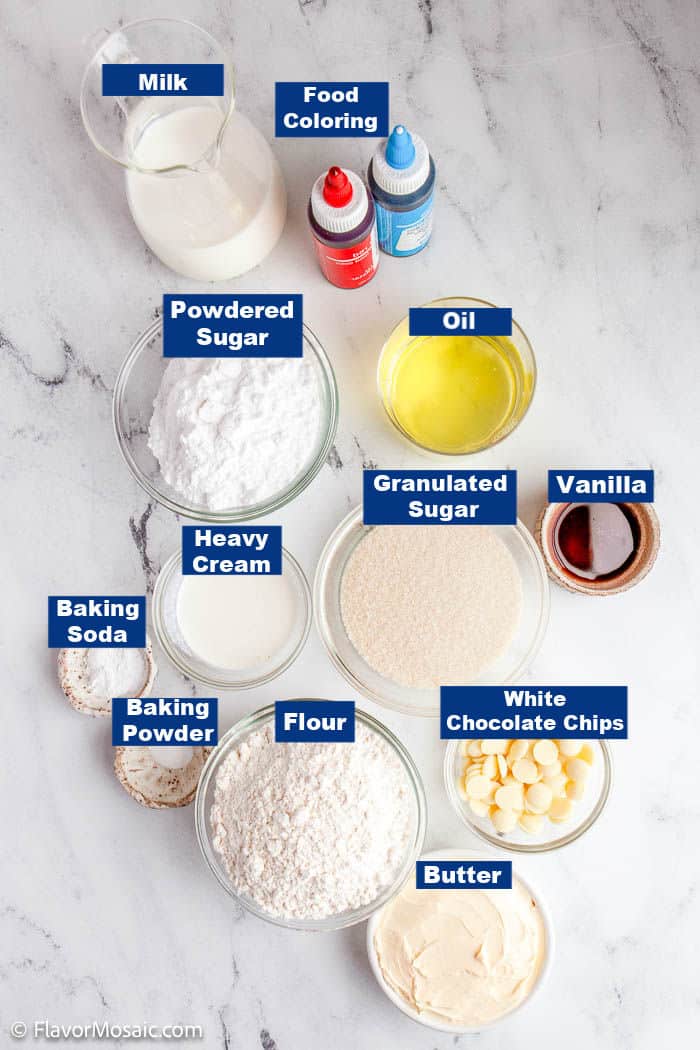
- Butter – Softened. I usually opt for unsalted butter for baking.
- Granulated sugar – 1 ½ tablespoons extra sugar will be needed for the egg whites in addition to the 3 cups. If you don’t have white granulated sugar then you could use a very light brown granulated sugar – it will give a slightly deeper flavor and add to the moisture in the cupcakes.
- Egg whites – These are going to be added to the 1 ½ tablespoons of granulated sugar to form stiff peaks that will be folded into the cupcake batter. This technique produces super light and fluffy cupcakes!
- Baking powder and soda – I try to get into the habit of checking the expiration date on baking powder and soda as this can have a direct impact on the outcome of the cupcake bases and how well they rise while baking.
- Flour – I used all-purpose flour for the cupcakes but if you need these cupcakes to be gluten-free then I suggest using something like King Arthur or Bob’s Red Mill gluten-free flour which is a convenient measure-for-measure substitution.
- Vanilla – Use the brand of vanilla extract that you enjoy baking with. A high-quality extract always increases the flavor of baked treats.
- Milk – Full cream milk or low-fat milk can be used. You’ll find that the full cream milk will add more flavor and moisture to the cupcakes.
- White chocolate – Use any white chocolate that melts well like white chocolate melting wafers. If you use something like white chocolate chips then you may need to add oil to achieve a smooth consistency.
BUTTERCREAM
- Powdered sugar – I like to take extra care with measuring my sifted powdered sugar as too much can cause an overly sweet buttercream and also affect the overall texture since it can dry out the buttercream.
- Butter – Softened and preferably unsalted.
- Vanilla
- Whipping cream – This makes the buttercream extra creamy and luxurious.
- Food coloring – While I’ve used red and blue food coloring for these July 4th cupcakes, you can use food coloring of your choice especially if you decide to use this recipe for other occasions and holidays.
How To Make Red White And Blue Cupcakes
Cupcake Instructions
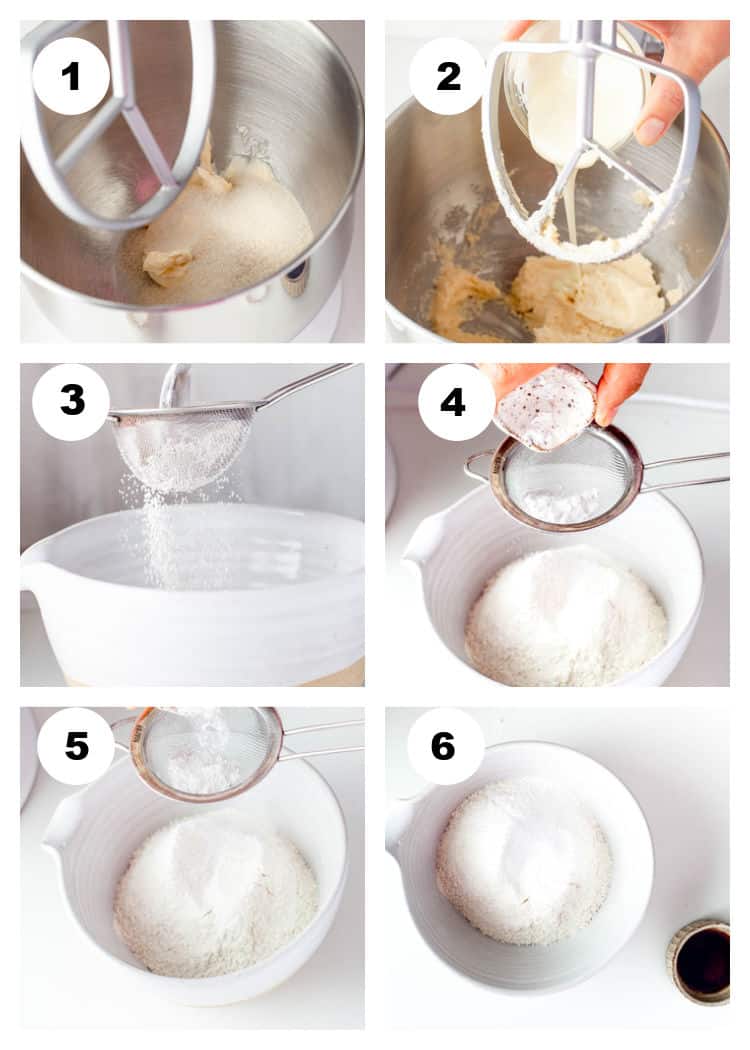
- In a standing mixer, cream the butter until fluffy with the sugar, except for the extra 1 ½ tablespoons.
- Place the white chocolate in the microwave for 20-second intervals until completely melted. Make sure not to burn. Add the white chocolate to the sugar mixture.
- Add the sifted dry ingredients, including baking powder,
- Baking Soda
- Salt.
- Mix until combined.
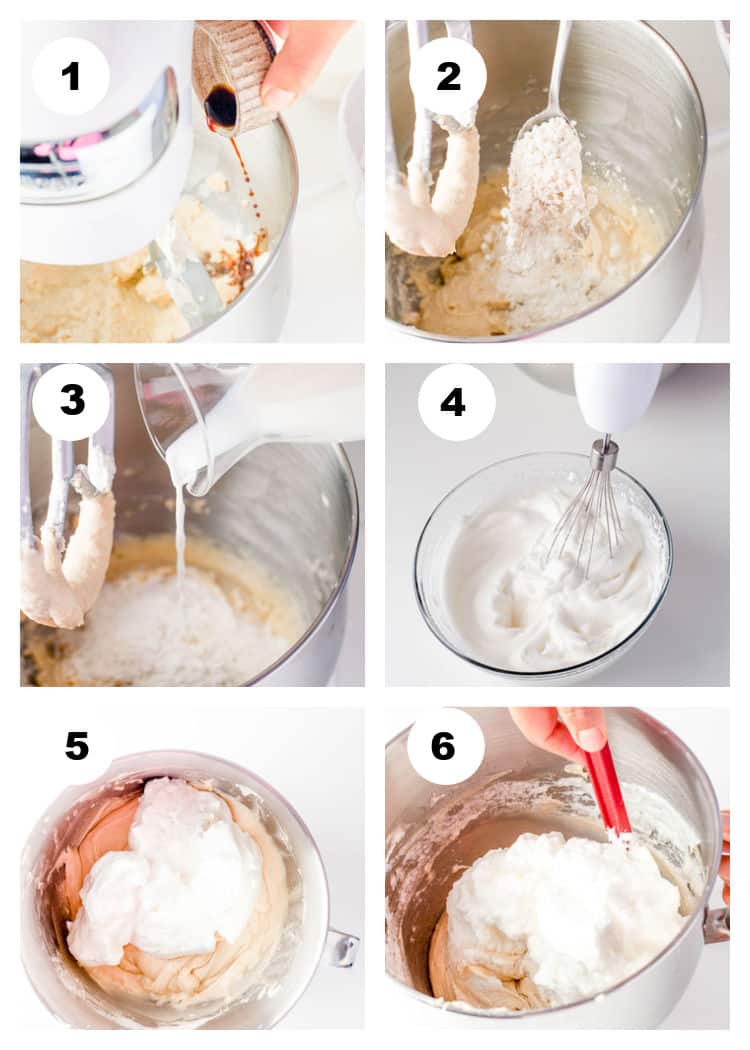
- Add the vanilla, and
- Alternating with sifted dry ingredients,
- Add the milk and mix until combined. Be careful to not overmix.
- In another bowl, whisk the egg whites until they are light and fluffy. Add in the 1 ½ tablespoons of sugar, little by little.
- Whisk the egg whites until they form peaks.
- Then fold them into the cupcake mixture.
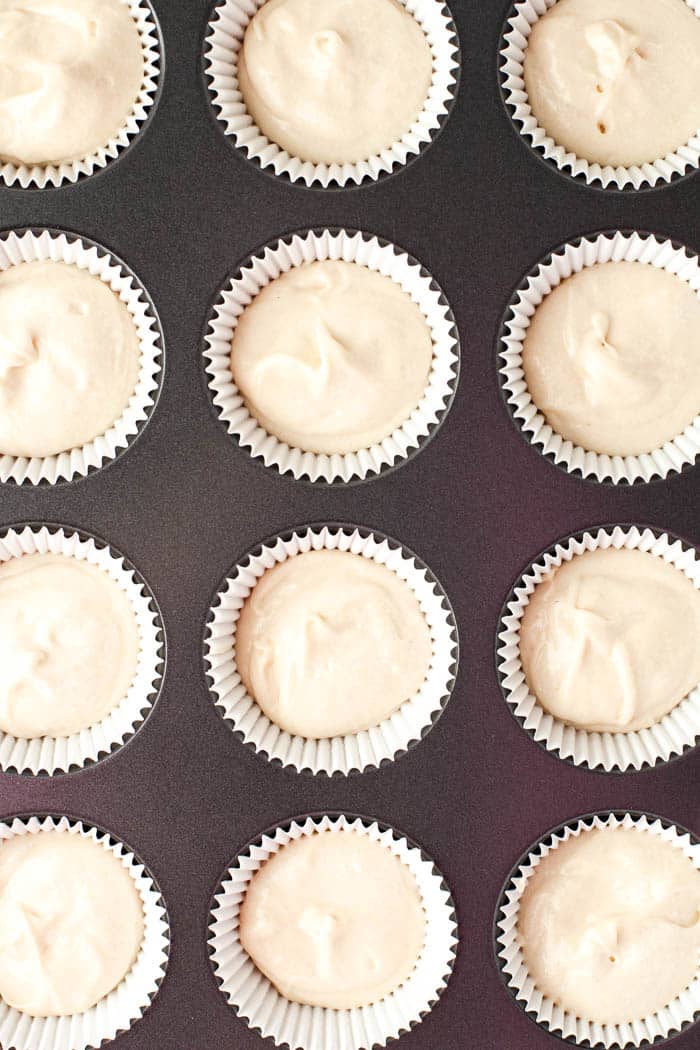
- Distribute the batter evenly into cupcake liners, filling each liner about ⅔ of the way up.
- Bake for 19 – 20 minutes at 350 or until you insert a toothpick and it comes out clean.
How To Make Buttercream Frosting
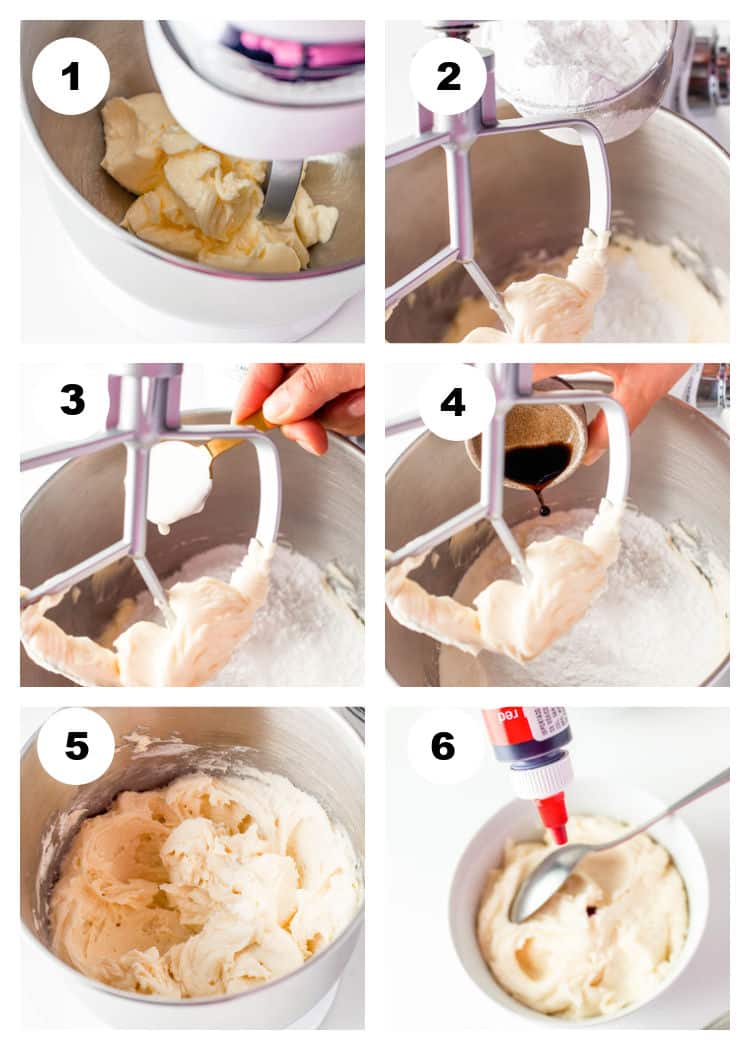
- Using a standing mixer, cream the butter until light and fluffy.
- Add in the sifted powdered sugar, little by little
- Alternate with the whipping cream,
- And the vanilla.
- Mix until fluffy.
- Divide the buttercream frosting evenly into 3 separate bowls (Distribute evenly, I would suggest using a kitchen scale), add one food coloring to each bowl (one red, one blue), and stir until you get the right color you need.
How To Make Buttercream Frosting Red White and Blue
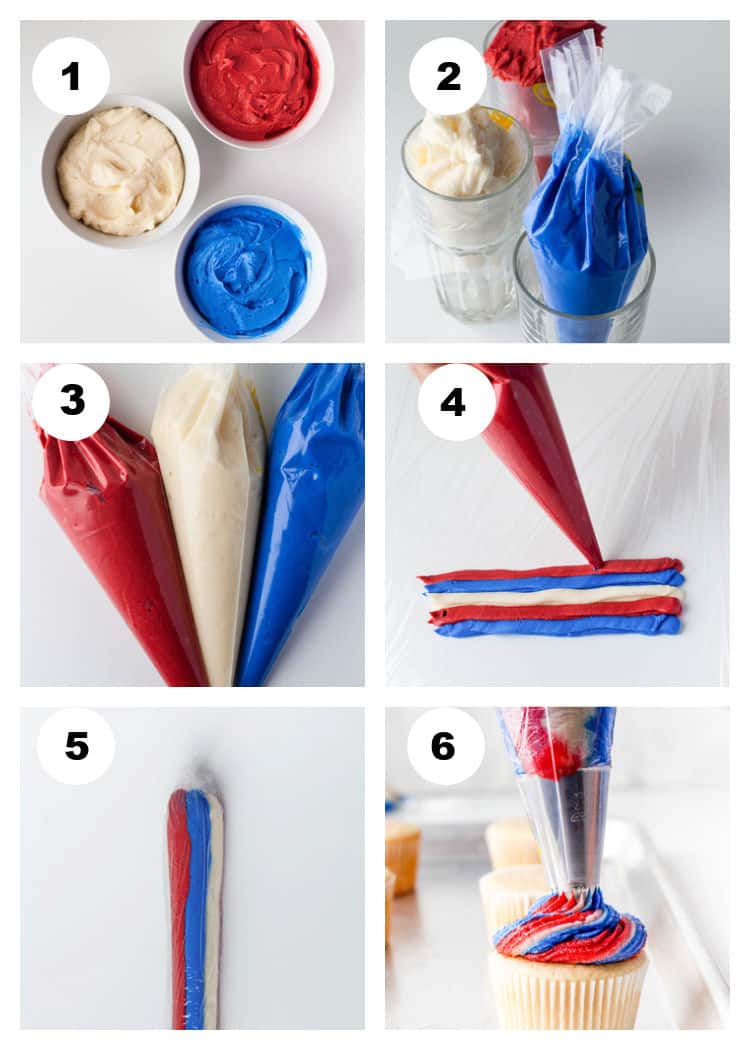
- Add one color of the food coloring to each of the bowls and mix until the color is evenly distributed throughout all the buttercream.
- Transfer each color into a piping bag.
- Fill each bag with a different color of buttercream frosting.
- Take a piece of plastic wrap and lay it on your counter. Then take the blue color piping bag and spread a line over the plastic wrap. The line should measure approximately the length of your piping bag. It should fit into the bag and fill it almost completely in length. Repeat once again on top so you have a line that is double the thickness. Continue doing the same thing for the red color, then the white, and repeat each color once more until there are two blue lines, two white, and two red.
- Roll one edge in until it touches the last color which should be white. In the end, the blue touches the white color. This will give you the shape of a cylinder. Tie up the edges. Cut one of the edges and place that part into the bottom of another piping bag sleeve with your decorating tip placed. This way your dollop of icing will be three colors and the colors won’t smudge together.
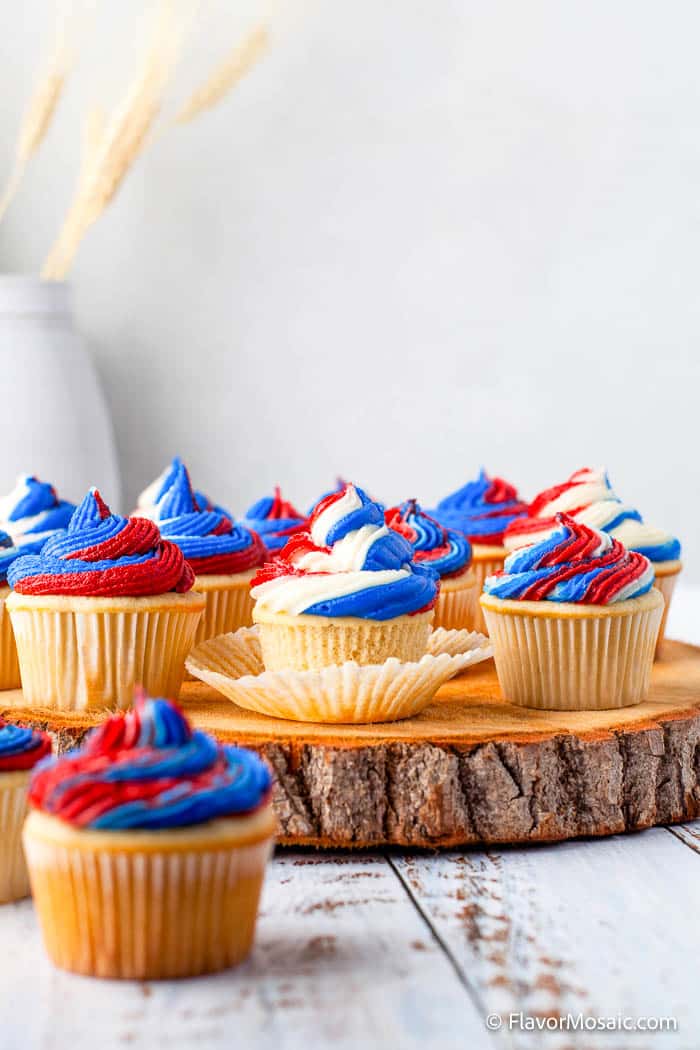
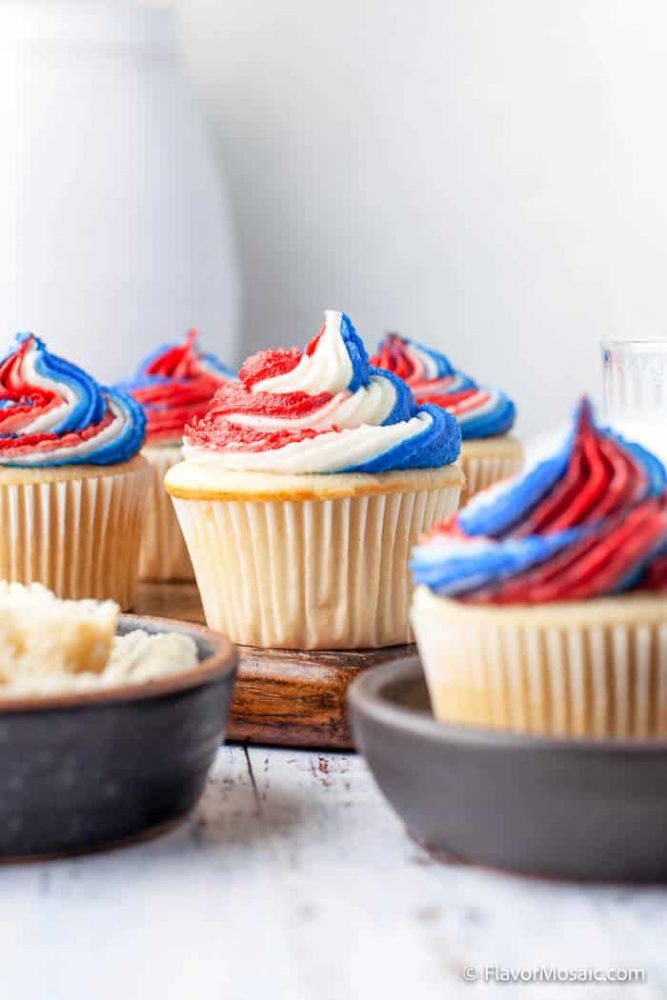
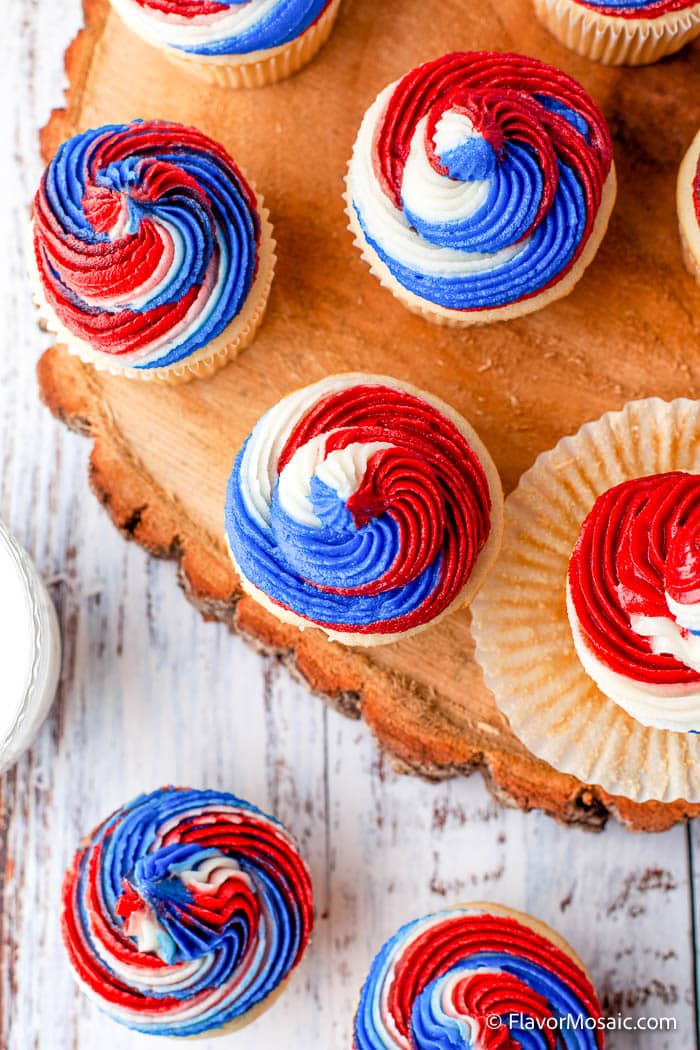
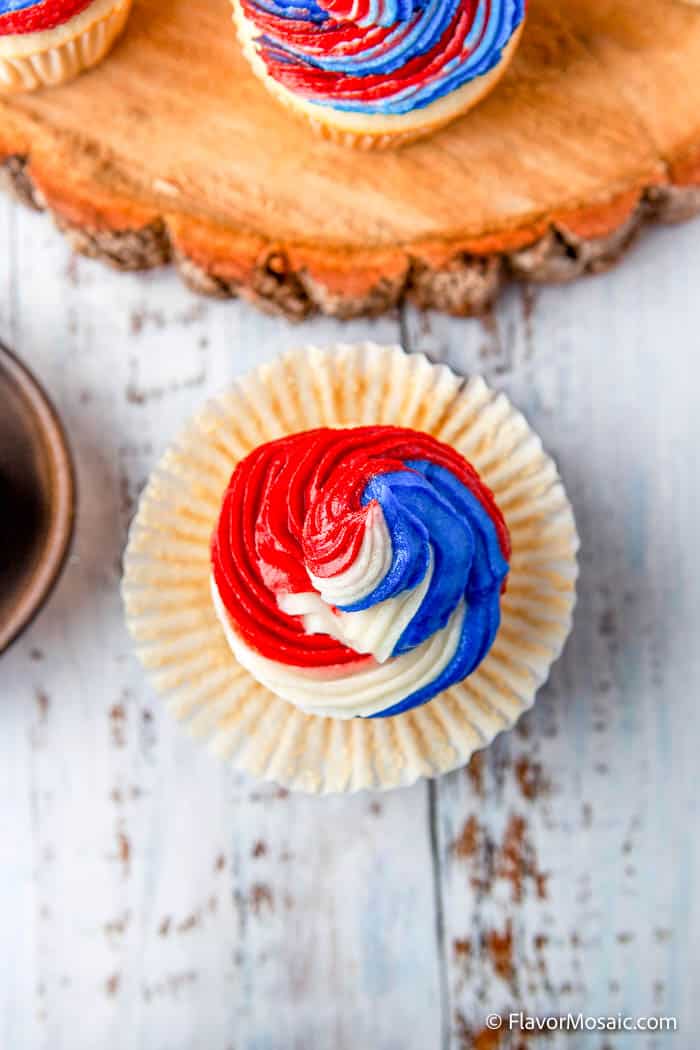
- Pipe the red white and blue buttercream frosting on the top of each cupcake, starting from the outside and going round and round, moving inward, until complete. They are ready to serve. Enjoy!
Recipe Tips
- As with most cake and cupcake recipes, over stirring the batter will result in crumbly (and possibly rubbery) cupcakes. You only need to stir just until the flour is incorporated, no more.
- If you’ve opted to make these cupcakes gluten-free with your choice of gluten-free flour, just be aware that it’s normal for the cupcakes to require additional baking time than what’s called for in this recipe. You can always test the cupcakes for doneness by inserting a toothpick into them which should come out clean if cooked through.
- An easy way to ensure a smooth consistency to the buttercream is to use a stand mixer with the paddle attachment. While you could make the buttercream by mixing by hand, it won’t have a velvet-smooth finish and will definitely require additional arm work!
- These cupcakes can be enjoyed at room temperature or chilled.
- Wait for the cupcakes to completely cool before even attempting to pipe the buttercream otherwise you will ruin the buttercream and end up with a melted mess.
- To reduce the possibility of any bubbles in the cupcake batter, simply tap the cupcake pan gently on the countertop prior to baking.
- If you’d like to make these cupcakes in advance, consider baking the cupcakes ahead of time, leaving the buttercream to make and pipe just prior to serving.
- Add 1-2 drops of food coloring per color and then assess whether additional food coloring needs to be added to intensify the colors.
- I’ve used plain cupcake liners. It’s a great way to remove the cupcakes from the pan with ease. For added decoration, consider using July 4th themed cupcake liners that can be sourced from party shops or online. Cupcake liners also help to keep cupcakes fresh for longer.
- Be careful not to fill the cupcake liners too high with the batter as the cupcakes will rise while baking. Filling each liner three quarters to the top will work.
Recipe Variations
- Flour: I’ve only ever tested these cupcakes with all-purpose flour since it’s my choice of sturdy flour for baking with. From my experience of making gluten-free baked goods, I believe that these cupcakes will still turn out beautifully when using gluten-free blends such as King Arthur of Bob’s Red Mill.
- Cupcake base: The cupcake base for this recipe is a simple vanilla-flavored batter. You could get creative and turn these into poke cake cupcakes once baked, filling them with blue and red gelatin milk filling that will seep into the cupcake bases and create a stunning visual effect when bitten into.
- Boozy cupcakes: Make a batch of boozy July 4th cupcakes just for the adults to enjoy with some creamy vanilla liqueur in the cupcake batter. Factor the amount of alcohol into the overall liquid quantities permitted in this recipe. For example, you could reduce the milk slightly to accommodate the addition of alcohol.
What To Serve With 4th of July Cupcakes
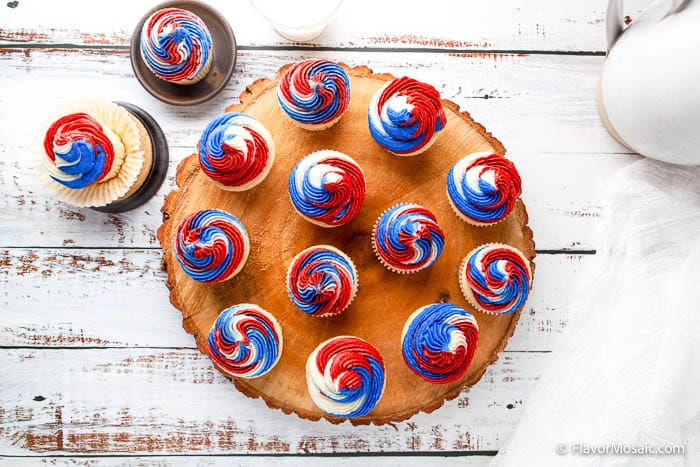
These July 4th cupcakes are stunning treats that would be the perfect addition to a July 4th charcuterie dessert board. Feel free to add some star-shaped sprinkles to the buttercream for extra decoration. Themed cupcake liners are also a super cute option!
FAQs
WHAT KIND OF TEXTURE DO THESE JULY 4TH WHITE CHOCOLATE CUPCAKES HAVE?
These holiday cupcakes are soft with just the right amount of moisture. The folded egg whites and sugar create a very fluffy and light cupcake base which is a lovely contrast to the thick and creamy-rich buttercream.
The melted white chocolate in the cupcake batter turns ordinary vanilla cupcakes into a decadent dessert – it’s seriously a game-changer!
HOW SHOULD I STORE LEFTOVER JULY 4TH WHITE CHOCOLATE CUPCAKES?
These cupcakes can be stored in a cool and dry area in an airtight container for 1 -2 days but I tend to prefer storing them in the refrigerator for 3-4 days since they contain a good amount of dairy-based ingredients in the batter and the buttercream.
Since these patriotic cupcakes are going to be made in the heat of summer, I think refrigeration is a safe choice for leftovers or when making them in advance.
CAN I FREEZE JULY 4TH WHITE CHOCOLATE CUPCAKES?
Absolutely! I recommend that you store the baked cupcake bases (without buttercream) in the freezer only as it’s going to be rather tricky to store the cupcakes with buttercream, not to mention that the freezing can affect the texture of the buttercream.
Once completely cooled, wrap each cupcake base in plastic wrap and then store them in an airtight container or large Ziploc bag in the freezer for up to 3 months.
Thaw the frozen cupcake bases in the refrigerator overnight and then make the buttercream and pipe it onto the cupcakes just prior to serving these scrumptious cupcakes to guests and family.
HOW DO I PREVENT THESE CUPCAKES FROM STICKING TO THE PAN WITHOUT LINERS?
If you intend to pour the cupcake batter directly into the cupcake pan, it’s a good idea to spray the pan with non-stick cooking spray.
IS THERE A TRICK TO PIPING THESE CUPCAKES?
There is a little bit of a process to follow when setting up your buttercream so that when it comes out of the final piping bag with decorating tip, the colors aren’t blended but rather produce clear lines of alternating colors. Be sure to follow my step-by-step instructions before piping these cupcakes.
More Recipes
If you like this recipe or make this recipe, be sure to leave a comment, rate the recipe, and follow us on:
Facebook | Twitter | Pinterest | BlogLovin | Instagram
Recipe
July 4th White Chocolate Cupcakes Recipe
Ingredients
Cupcakes
- 9 Tablespoons Butter, softened (130 g)
- ¾ cup granulated sugar (and 1 1/2 Tablespoons extra for the egg whites)
- 3 egg whites
- 1 teaspoon baking powder
- ¼ teaspoon baking soda
- 2 cups all-purpose flour
- 1 teaspoon vanilla
- 1 cup milk (plus 1 Tablespoon of milk)
- ¼ cup white chocolate
Buttercream Frosting
- 5 1/2 cups powdered sugar sifted (800 grams)
- 2 cups Butter softened (400 grams)
- 1 teaspoon Vanilla
- 2 Tablespoons whipping cream
- Food coloring of your choice (This recipe is made with red and blue)
Instructions
White Chocolate Cupcakes
- In a standing mixer, cream the butter until fluffy with the sugar, except for the extra 1 ½ tablespoons.
- Place the white chocolate in the microwave for 20 second intervals until completely melted. Make sure not to burn. Add the white chocolate to the sugar mixture.
- Add the sifted dry ingredients, alternating with the milk and vanilla. Mix until combined. Be careful to not over mix.
- Preheat the oven to 350 degrees F. Place cupcake papers in a cupcake pan.
- In another bowl, whisk the egg whites until they are light and fluffy. Add in the 1 ½ tablespoons of sugar, little by little.
- Once the egg whites form peaks, fold them into the cupcake mixture.
- Distribute the batter evenly into cupcake liners, filling each liner about ⅔ of the way up.
- Bake for 19 – 20 minutes at 350 or until you insert a toothpick and it comes out clean.
Buttercream Frosting
- Using a standing mixer, cream the butter until light and fluffy.
- Add in the sifted powdered sugar, little by little, alternating with the vanilla and whipping cream.
- Mix until fluffy and transfer into three separate bowls. Distribute evenly, I would suggest using a kitchen scale.
- Add in the food coloring to each of the bowls and mix until the color is even throughout all the buttercream.
- Transfer each color into a piping bag. Take a piece of plastic wrap and lay it on your counter. Then take the blue color piping bag and spread a line over the plastic wrap. The line should measure approximately the length of your piping bag. It should fit into the bag and fill it almost completely in length. Repeat once again on top so you have a line that is double the thickness.
- Continue doing the same thing for the red color, then the white, and repeat each color once more until there are two blue lines, two white, and two red.
- Roll one edge in until it touches the last color which should be white. At the end, the blue touches the white color. This will give you the shape of a cylinder. Tie up the edges. Cut one of the edges and place that part into the bottom of another piping bag sleeve with your decorating tip placed. This way your dollop of icing will be three colors and the colors won’t smudge together.
- Add a large dollop onto each cupcake, from the outside inwards, and serve. Make sure your cupcakes are completely cooled before adding the icing. If not the frosting can melt. Serve and enjoy!
Video
Notes
- As with most cake and cupcake recipes, over stirring the batter will result in crumbly (and possibly rubbery) cupcakes. You only need to stir just until the flour is incorporated, no more.
- If you’ve opted to make these cupcakes gluten-free with your choice of gluten-free flour, just be aware that it’s normal for the cupcakes to require additional baking time than what’s called for in this recipe. You can always test the cupcakes for doneness by inserting a toothpick into them which should come out clean if cooked through.
- An easy way to ensure a smooth consistency to the buttercream is to use a stand mixer with the paddle attachment. While you could make the buttercream by mixing by hand, it won’t have a velvet-smooth finish and will definitely require additional arm work!
- These cupcakes can be enjoyed at room temperature or chilled.
- Wait for the cupcakes to completely cool before even attempting to pipe the buttercream otherwise you will ruin the buttercream and end up with a melted mess.
- To reduce the possibility of any bubbles in the cupcake batter, simply tap the cupcake pan gently on the countertop prior to baking.
- If you’d like to make these cupcakes in advance, consider baking the cupcakes ahead of time, leaving the buttercream to make and pipe just prior to serving.
- Add 1-2 drops of food coloring per color and then assess whether additional food coloring needs to be added to intensify the colors.
- I’ve used plain cupcake liners. It’s a great way to remove the cupcakes from the pan with ease. For added decoration, consider using July 4th themed cupcake liners that can be sourced from party shops or online. Cupcake liners also help to keep cupcakes fresh for longer.
- Be careful not to fill the cupcake liners too high with the batter as the cupcakes will rise while baking. Filling each liner three quarters to the top will work.

Kris says
Pinned to make with my kiddos for the 4th! Can’t wait.
Michele says
Hi Kris,
I hope you and your kids enjoy the cupcakes!
Michele
Anita says
The cupcakes looks so pretty. I love the piping technique, and the colors are super spot on for 4th of July.
Michele says
Thank you Anita!
Sara Welch says
Such a fun and festive treat, indeed! Saving these for Memorial Day; looks too good to pass up!
Michele says
Hi Sara,
Thanks. These red white and blue cupcakes will be great for Memorial Day.
Michele
Jill says
I love how vibrantly colored the frosting is on these cupcakes. Love the white chocolate flavor too. Great work!!
Michele says
Thanks Jill!
Bernice says
I used your recipe for our son’s birthday party last weekend (different colour scheme of course!). They baked up nice and fluffy…saving the recipe to make again.
Michele says
Hi Bernice,
I’m so glad you liked it. Thanks for letting us know.
Michele
Ann says
I love white chocolate, but never think to make it! Your presentation is beautiful! I can just picture my kids devouring these cupcakes, with blue and red faces!
Michele says
Hi Ann,
Thank you. Yes, the red and blue faces are part of the fun!
Michele
Amanda says
These are the perfect summer cupcakes! That piping technique works beautifully, and the cupcakes are so soft and fluffy. Love them!
Michele says
Thanks Amanda!
Jacque Hooper says
What a fun and patriotic cupcake! These will be perfect for the 4th of July this year; excited to give these a try!
Michele says
Hi Jacque,
I hope you enjoy them!
Michele
Andrea says
Fun, Festive and definitely be a crowd pleaser. Thank you for the pictures and instructions on how to get the frosting to look like that.
Michele says
Hi Andrea,
Thank you for the kind words.
Michele
Jess says
I have never understood how to do multi-colored frosting. Your directions were so clear and easy to follow!
Tayler says
I just love that white chocolate flavor! I will definitely be making these for Memorial Day weekend!
Michele says
Hi Taylor,
I hope you enjoy them.
Michele