
This post may contain affiliate links. Please read our disclosure policy.
Intimidated by making a homemade pie crust from scratch?
Don’t be! This one’s buttery, flaky, and practically foolproof, even if it’s your first time!

Whether you’re baking up a sweet slice of Blueberry Pie or something a little extra (hey there Pecan Cream Pie) for one of your favorite Dessert Recipes, this buttery pie crust recipe’s got your back.
Table of Contents
- What Makes This Recipe Unique?
- Ingredient Notes
- 🥣 How to Make Homemade Pie Crust (Step-by-Step)
- How to Roll Out and Use Pie Crust
- 🔥 Blind Baking (Par-Baking) Instructions
- 💡 Pro Pie Crust Tips
- Make-Ahead and Storage
- Pro Recipe Tips
- Recipe Variations and Ideas
- What to Serve with This Pie Crust
- Final Thoughts
- Recipe
- Reviews
What Makes This Recipe Unique?
- Bakery Level Tips: I include pro tips that bakeries often use, such as grating butter, and folding dough like a letter for extra flakiness.
- Dual Method Approach: 📌 No fancy equipment required, just cold butter, ice water, and your hands. However, I also include instructions for using a food processor to make it even easier.
- Tips for Savory and Sweet: Tips for not only sweet pies but for savory dishes requiring a pie crust as well, like Mini Chicken Pot Pies.

Ingredient Notes
Just the basics, but with big flavor payoff:
- All-purpose flour - sturdy and reliable for flaky layers.
- Salt - balances the richness and sweetness.
- Sugar (optional) - a touch of sweetness for dessert pies.
- Cold unsalted butter - the key to those tender, flaky pockets.
- Ice water - keeps the butter from melting into the dough.
👩🍳 Pro Tip: For ultra-tender dough, grate frozen butter straight into the flour.

🥣 How to Make Homemade Pie Crust (Step-by-Step)
In a large bowl, combine the flour, salt, and sugar (if using).

Add the cold butter cubes to the flour mixture. Use a pastry cutter, fork, or your fingers to work the butter into the flour.

The mixture should resemble coarse crumbs with pea-sized pieces of butter remaining.

Slowly add the ice water, 1 tablespoon at a time, mixing gently with a fork until the dough begins to come together.
You may not need all the water, so stop adding once the dough holds together when pressed.

Turn the dough out onto a lightly floured surface and gently knead it a few times to bring it together into a ball.
Flatten it into a disc and wrap it tightly in plastic wrap. Chill in the refrigerator for at least 60 minutes before rolling out.

Once chilled, roll the dough out on a lightly floured surface to about ⅛ inch thickness, rotating it as you go to prevent sticking.

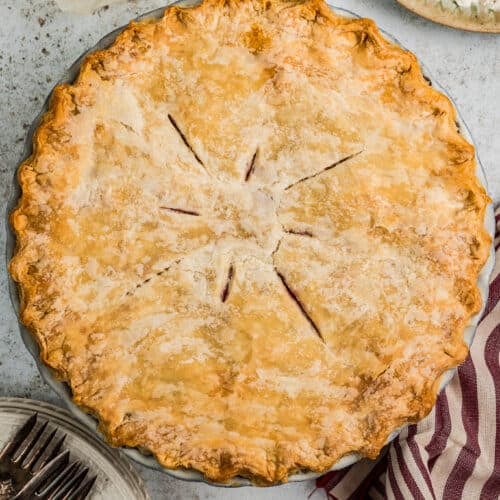
Transfer it to your pie dish and trim the edges, leaving about 1 inch of overhang. Fold the edges under and crimp them to your desired pattern.

If filling and adding a top, dampen your finger, then add the top crust and press together before crimping the edges, then trim off any excess crust.

Bake at 375°F for 20-25 minutes, then remove the weights and parchment and bake for an additional 5-10 minutes until golden.

⚙️ Food Processor Method:
- Turn out, divide in half, shape into discs, wrap, and refrigerate.
- Pulse the flour, salt, and sugar to combine.
- Add cold cubed butter and pulse 8-10 times until crumbly with pea-sized pieces.
- While pulsing, drizzle in ice water one tablespoon at a time until the dough clumps.
How to Roll Out and Use Pie Crust
- Lightly flour your surface and rolling pin.
- Roll dough from the center out to ⅛-inch thick.
- Rotate often to prevent sticking.
- Drape into your pie dish and trim with 1-inch overhang.
- Fold edges under and crimp to seal.
Need a Double pie crust recipe? Dampen the edges with water, add top crust, press, crimp, and trim.
🔥 Blind Baking (Par-Baking) Instructions
Making a custard or no-bake pie? Blind bake like a pro:
- Line the crust with parchment paper.
- Fill with pie weights or dried beans.
- Bake at 375°F for 20-25 minutes.
- Remove weights and parchment. Bake 5-10 minutes more until golden.
💡 Pro Pie Crust Tips
- Cold is key. Chill the butter, the water, and the dough.
- Don't overwork it. Handle the dough as little as possible.
- Chill before baking. Always. This prevents shrinking.
- Protect the edges. Use foil for the first 20 minutes, then remove.
- No soggy crusts. Prebake when needed and bake pies on a sheet pan.

Make-Ahead and Storage
- Store wrapped dough in the fridge for up to 2 days.
- Or freeze for up to 3 months-just thaw in the fridge overnight.
- Rolled out and ready to go? Freeze in a pie pan for the easiest pie-making ever.
Pro Recipe Tips
- Prebake Pie Crust before adding the pie filling to avoid a soggy crust.
- Sheet Pan: Place pie on a sheet pan to prevent pie filling from spilling in the oven. This helps to keep the oven clean.
- Seal Edges: Fold top pie crust under the bottom pie crust around the edges to seal the edges. This makes the edges thicker.
- Prevent Edges From Overcooking: Add foil around the edges for about the first 20 minutes. Then remove the foil. This prevents the edges from browning too much.
- Protect Hands: Use a kitchen towel or wear oven mitts to avoid burning your hands when placing pie in the oven or taking out of the oven, or adding or removing the foil around the edges of the pie.
- Uneven Browning: If the pie crust is browning unevenly while cooking, use a kitchen towel or oven mitts to turn the pie so that the crust will brown evenly on all sides.
- Optional: Make an egg wash and brush evenly over the top of the crust.
Recipe Variations and Ideas
- Flavor Extract: Add 1 tsp vanilla or almond extract for a subtle flavor twist (great for fruit pies!).
- Egg Wash: Brush top crust with egg wash for a glossy finish.
- Sweet: Sprinkle with sugar or cinnamon sugar before baking for a sweet crunch.
- For savory pies: skip the sugar and add a pinch of dried herbs to the dough.
What to Serve with This Pie Crust
Once you've nailed this crust, the possibilities are endless:
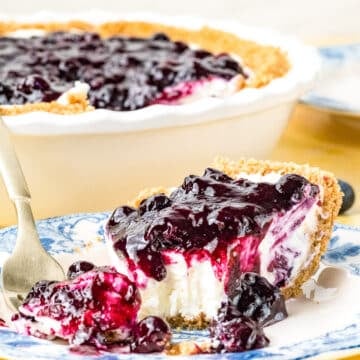
- Easy Blueberry Pie
- Canned Peach Pie
- Fresh Strawberry Pie
- Irish Apple Pie
- Pecan Cream Pie
- Chicken Pot Pie Casserole
Final Thoughts
You don't need to be a pastry chef to make a showstopping flaky pie crust recipe. Just some cold butter, a little patience, and maybe a dance break while the dough chills. 😉
Ready to roll? Let's get baking! 🥧 Be sure to leave a rating and comment if you have made it. Share your pie crust tips!
Recipe
Ingredients
- 2 ½ cups all-purpose flour
- 1 teaspoon salt
- 1 tablespoon sugar optional, for sweet pies
- 1 cup 2 sticks unsalted butter, cold and cut into small cubes
- 6-8 tablespoons ice water
Instructions
By Hand
 In a large bowl, combine the flour, salt, and sugar (if using).
- Add the cold butter cubes to the flour mixture. Use a pastry cutter, fork, or your fingers to work the butter into the flour until it resembles coarse crumbs with pea-sized pieces of butter remaining.
- Slowly add the ice water, 1 tablespoon at a time, mixing gently with a fork until the dough begins to come together. You may not need all the water, so stop adding once the dough holds together when pressed.
- Turn the dough out onto a lightly floured surface and gently knead it a few times to bring it together into a ball. Flatten it into a disc and wrap it tightly in plastic wrap. Chill in the refrigerator for at least 60 minutes before rolling out.
- Once chilled, roll the dough out on a lightly floured surface to about ⅛ inch thickness, rotating it as you go to prevent sticking. Transfer it to your pie dish and trim the edges, leaving about 1 inch of overhang. Fold the edges under and crimp them to your desired pattern.
- If filling and adding a top, dampen your finger, then add the top crust and press together before crimping the edges, then trim off any excess crust.
- For a blind-baked crust (if you're using it for a no-bake filling or need to pre-bake), line the crust with parchment paper and fill it with pie weights or dried beans.
- Bake at 375°F for 20-25 minutes, then remove the weights and parchment and bake for an additional 5-10 minutes until golden. Then add filling and top crust and bake per instructions of the specific pie recipe.


Food Processor Method
- In the bowl of a food processor, combine the flour, salt, and sugar (if using). Pulse a few times to mix.
- Add the cold, cubed butter. Pulse about 8-10 times, or until the mixture resembles coarse crumbs with some pea-sized pieces of butter remaining.
- With the processor running, slowly drizzle in the ice water, one tablespoon at a time, just until the dough starts to come together. You may not need all the water-stop as soon as the dough begins to clump and hold together when pinched.
- Turn the dough out onto a clean surface. Divide it into two equal portions and shape each into a disc. Wrap tightly in plastic wrap and refrigerate for at least 1 hour before rolling out.
- Bake at 375°F for 20-25 minutes, then remove the weights and parchment and bake for an additional 5-10 minutes until golden.
Video

Hi, I’m Michele Feuerborn, a home cook with 25+ years experience, and former AllRecipes Allstar, creating bold & easy Southern, Mexican, Tex-Mex, and Instant Pot recipes. Featured in publications like Parade and BuzzFeed. Read More…


Comments
No Comments