Mummy Oreo Truffles are little balls of decadence with massive Halloween flare!
Sink your teeth into finely crushed Oreo cookies with tangy cream cheese, coated in smooth melted white chocolate and then dressed up with mummy-like chocolate-drizzle bandages and spooky candy eyes!
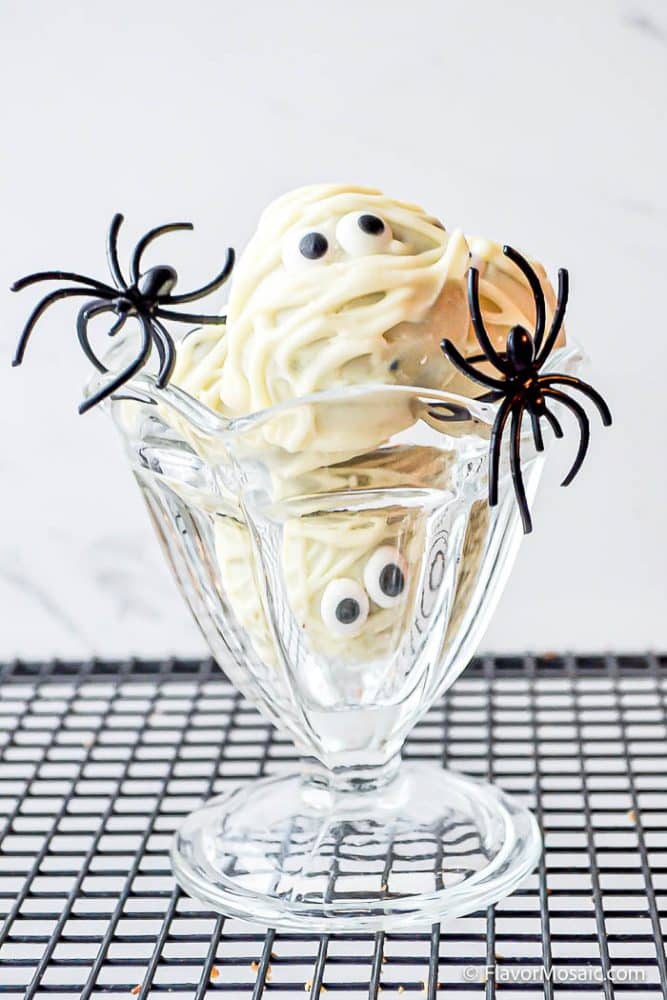
Are you ready for Halloween?! Whether you celebrate Halloween in a spooky and creepy style or enjoy cute and cheerful recipes this time of year, these Mummy Oreo Truffles are going to satisfy those cookies and cream cravings while adding a fun twist to classic Oreo truffles!
These Halloween Mummy Oreo Truffles offer a mouth-watering combination of sweet and creamy Oreo cookie centers with a rich white chocolate exterior that snaps upon first bite.
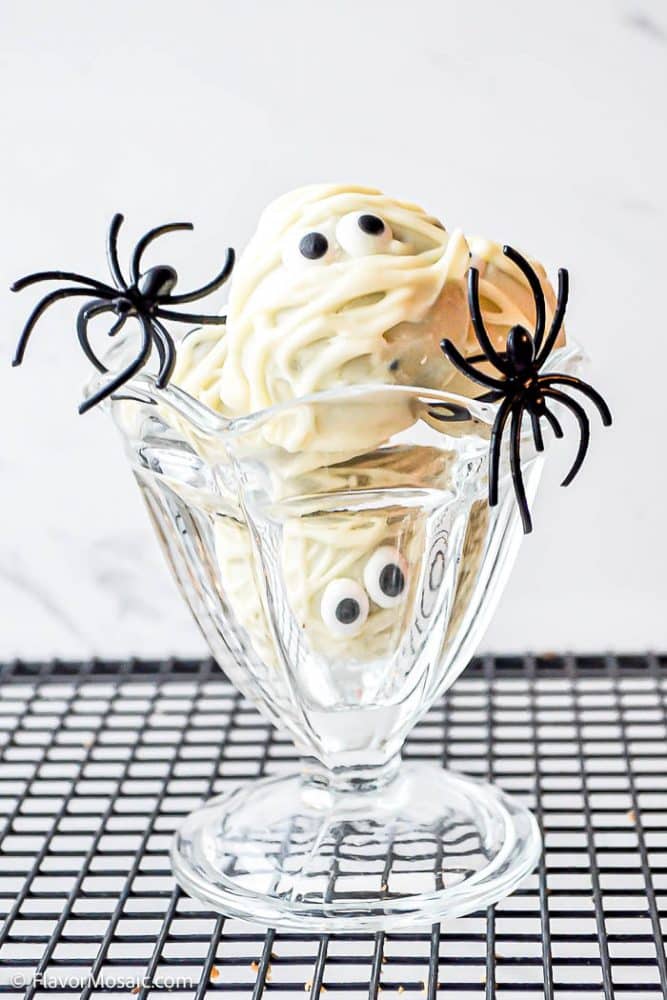
Add your spooky Mummy Oreo Truffles on a Halloween-themed treats platter or serve them as a cute and fun dessert alongside a scoop of Cookies and Cream ice cream!
One thing is for sure – these Oreo truffles dressed up as mummies are going to be a hit with kids and adults alike. I mean, who doesn’t love Oreo truffles?!

Why You’ll Love This Recipe
- Easy to assemble: These Mummy Oreo Truffles are incredibly easy to make. In fact, the majority of the recipe time is allocated to chilling the oreo balls in the refrigerator or freezer before coating them with melted chocolate and allowing them to set once fully assembled.
- Make ahead: Mummy Oreo Truffles can be made in advance and stored in the refrigerator for up to 3 weeks or in the freezer for up to 2 months!
- Versatile: Explore your creativity with these Mummy Oreo Truffles. There are numerous ways that you can adapt the recipe to suit your preferences and style.
- Kid-Friendly: Get your kids involved when making your Mummy Oreo Truffles. Allowing them to shape the oreo balls and coat them in chocolate will keep them busy with a fun kitchen activity that they can feel proud of!
- Yields a large quantity: If you are hosting a Halloween party then this recipe will definitely be able to cater for the numbers, making about 3 dozen Oreo truffles! Of course, feel free to halve or double the recipe as you wish.
- Multipurpose: These tasty little Oreo mummies can seriously add some Halloween flare to the party decorations while serving as scrumptious treats for all those cookies and cream lovers out there!
Why This Recipe Works
- This is a tried and tested recipe, allowing me to guide you through simple and clear recipe instructions with corresponding in-process images so that there’s no guesswork at all!
- Most of the recipe time is dedicated to chilling these Oreo truffles, which means that you can get on with other things in between the recipe steps.
- This is a no-bake Halloween treat which immediately makes it more kid-friendly if you intend to involve the kids in whipping up a batch!
- Useful tips and frequently asked questions are added in this recipe post for further clarification, making the recipe a breeze to understand and follow.
- I’ve included a few ways that you could adapt these Mummy Oreo Truffles with simple recipe substitutions and suggestions.
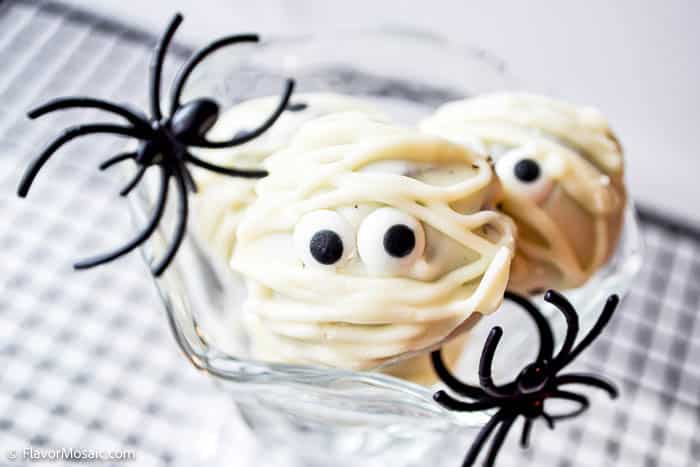
How To Make Mummy Oreo Truffles
Ingredient Notes
- Oreo cookies – I recommend using the original Oreo cookies for this recipe, NOT “Double Stuffed” for the best results.
- Cream cheese – Be sure to allow the cream cheese to soften before use.
- Vanilla extract – I recommend using pure vanilla and not imitation vanilla for the best results.
- Salt – A small amount helps to elevate the chocolate flavor in these Oreo truffles.
- White chocolate chips – If you use a substitute like almond bark or candy melts then you will need to omit the oil below.
- Vegetable oil – Canola oil can be used as well since it’s another flavorless oil.
- Candy eyes – The mummy needs to have eyes in order to see you better!
Easy Instructions With Photos
Make The Truffles
- In a food processor or high-powered blender, pulse the Oreo cookies until they are pulverized into fine crumbs.
- Add the cream cheese, vanilla, and salt, and pulse until moistened and combined.
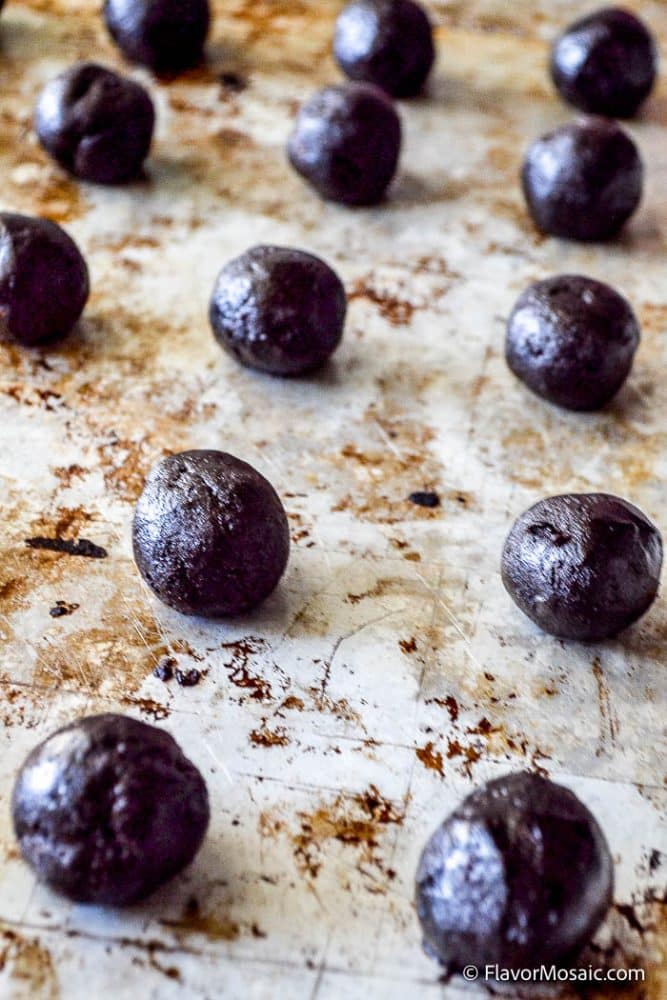
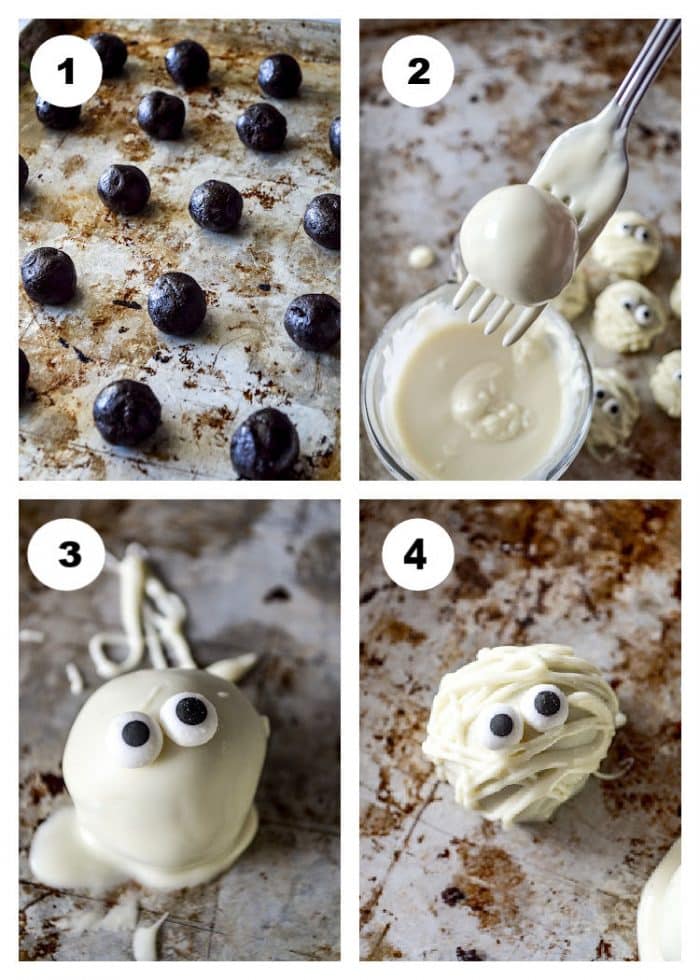
- Use a large melon baller, small cookie dough scoop, or measuring spoon to scoop out around a tablespoon of Oreo mixture at a time, then roll the mixture into a ball with your hands. Repeat with the remaining mixture and place the balls about 2 inches apart onto your prepared cookie sheet.
- Pop the Oreo balls into your fridge and chill for about 30 minutes. You can also freeze for about 15-20 minutes if preferred.
Make The White Chocolate “Mummy Wrap”
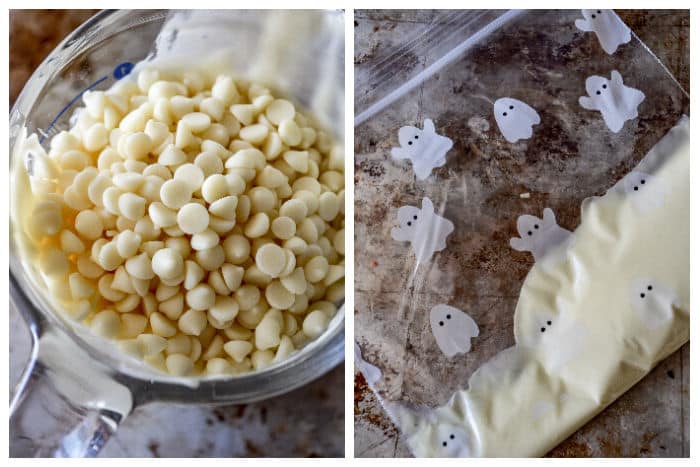
- Meanwhile, melt the white chocolate chips in a microwave safe bowl. Start with 30 seconds in the microwave, then stir. Continue microwaving in 10-15 second intervals until completely melted, stirring in between each interval.
- Stir the vegetable oil into the white chocolate until the texture is smooth and creamy.
Decorate The Mummy Oreo Truffles
- Working as quickly, but as thoroughly as possible, submerge the Oreo balls into the white chocolate. Use a fork to lift the Oreo balls out of the white chocolate coating and allow the excess to drip off into the bowl.
- Place the coated Oreo balls back onto the baking sheet and repeat the process until all of the balls are coated.
- Place two eyes on the top of each truffle and allow the coating to harden on your counter for about 30 minutes, or in the freezer for around 15 minutes.
- Pour the excess white chocolate into a zip lock baggie and seal. Snip off one corner of the bag (make a very small snip!) and pipe the white chocolate over the prepared truffles to create a bandaged, mummy-like appearance.
- Allow the finished truffles to harden completely before serving.
Pro Recipe Tips
- When adding the oreo cookies to the food processor, make sure to ddd in the entire cookie with the filling. The filling is needed just as much as the cookie to produce the right texture for the truffles.
- Don’t use “Double Stuff” Oreos for this recipe. The original Oreo cookies have the right amount of filling required for these truffles whereas the Double Stuff Oreos have too much filling and will compromise the texture of these treats.
- White almond bark, candy melts or Ghirardelli white chocolate wafers can be used for coating the mummy Oreo truffles instead of the chocolate chips. You will just need to omit the vegetable oil from the recipe since these alternative options don’t usually contain stabilizers as an ingredient, enabling them to melt much better into a smooth consistency without the aid of oil.
- If your melted chocolate looks and feels too thick, simply stir in 1 teaspoon of vegetable oil.
- Using a pair of clean craft tweezers will make it much easier when applying the candy eyes to your truffles. It’s also a great way to ensure a precise placement of the candy eyes but, of course, this is totally optional.
- The chocolate chips can also be melted over a double boiler if you don’t have a microwave at your disposal.
- It’s important that you allow your cream cheese to soften so that it mixes well with the crushed Oreos to form luscious truffle centers.
Recipe Variations
- Use Golden Oreos instead of the Original chocolate Oreos if you want a golden vanilla truffle center.
- Look out for limited edition Oreo cookies at the start of the fall season – Pumpkin Spice Oreos are a good example of making use of fun seasonal products to adapt these Mummy Oreo Truffles.
- Instead of candy eyes, you can draw on the mummy eyes using a black candy icing pen or by using frosting (black or even red would be great!).
- Insert some wooden popsicle sticks into the bottom of each Mummy Oreo Truffle if you want to display these fun Halloween treats in a jar or a decorated styrofoam base – they make a festive display for any spooky-themed party!
What To Serve With Mummy Oreo Truffles
While these Mummy Oreo Truffles can be served and enjoyed as is, you could add them to a Halloween-themed platter with other delicious and spooky treats.
Oreo Truffles can also be enjoyed with a scoop of Cookies and Cream ice cream or vanilla ice cream.
Frequently Asked Questions (FAQs)
WHY DO I NEED TO ADD OIL TO MELTED CHOCOLATE CHIPS?
Melted chocolate chips can sometimes form lumps and bumps due to stabilizer ingredients found in most brands. The addition of oil helps to smooth out the melted chocolate so that you get a lump-free consistency, perfect for coating treats such as these Mummy Oreo Truffles!
While I’ve used vegetable oil, you can also use another flavorless oil such as canola oil instead.
HOW SHOULD I STORE LEFTOVER MUMMY OREO TRUFFLES?
Whether you are making these Halloween Oreo truffles ahead of time or have any leftovers, you can store these truffles in 3 ways:
At Room Temperature: These chocolate coated Oreo truffles can be stored at room temperature in an airtight container for a day or two at most since they contain cream cheese. If your environment is somewhat warm or humid then rather store them in the refrigerator so that they don’t spoil.
Refrigerator: Store your Mummy Oreo Truffles in an airtight container in the refrigerator for up to 3 weeks.
Freezer: Store your treats in an airtight container in the freezer for up to 2 months. You can then allow them to soften slightly in the refrigerator before serving. If your candy eyes slide off, stick them back on with some frosting or extra melted chocolate.
WHAT IF I DON’T HAVE A FOOD PROCESSOR?
While I’ve found that a food processor does a great job of achieving the right texture and consistency that can easily be shaped into balls, if you don’t own a food processor then add your Oreo cookies to a Ziploc bag and crush them into very fine crumbs using a rolling pin.
After that, you will need to combine the cream cheese and crushed Oreos in a separate mixing bowl.
If you like this recipe or make this recipe, be sure to leave a comment, rate the recipe, and follow us on:
Facebook | Twitter | Pinterest | BlogLovin | Instagram
Recipe
Mummy Oreo Truffle
Ingredients
- 1 package Oreo cookies
- 8 ounces cream cheese softened
- 1 teaspoon vanilla extract
- ¼ teaspoon salt
- 24 ounces two bags white chocolate chips
- 2 tablespoons vegetable oil
- Candy eyes
Instructions
- Prepare a cookie sheet with foil or parchment paper and set aside.
- In a food processor or high-powered blender like a Ninja Foodie, pulse the Oreo cookies until they are pulverized into fine crumbs.
- Add the cream cheese, vanilla, and salt, and pulse until moistened and combined.
- Use a large melon baller, small cookie dough scoop, or measuring spoon to scoop out around a tablespoon of Oreo mixture at a time, then roll the mixture into a ball with your hands. Repeat with the remaining mixture and place the balls about 2 inches apart onto your prepared cookie sheet.
- Pop the Oreo balls into your fridge and chill for about 30 minutes. You can also freeze for about 15-20 minutes if preferred.
- Meanwhile, melt the white chocolate chips in a microwave safe bowl. Start with 30 seconds in the microwave, then stir. Continue microwaving in 10-15 second intervals until completely melted, stirring in between each interval.
- Stir the vegetable oil into the white chocolate until the texture is smooth and creamy.
- Working as quickly, but as thoroughly as possible, submerge the Oreo balls into the white chocolate. Use a fork to lift the Oreo balls out of the white chocolate coating and allow the excess to drip off into the bowl.
- Place the coated Oreo balls back onto the baking sheet and repeat the process until all of the balls are coated.
- Place two eyes on the top of each truffle and allow the coating to harden on your counter for about 30 minutes, or in the freezer for around 15 minutes.
- Pour the excess white chocolate into a zip lock baggie and seal. Snip off one corner of the bag (make a very small snip!) and pipe the white chocolate over the prepared truffles to create a bandaged, mummy-like appearance.
- Allow the finished truffles to harden completely before serving.
Video
Notes
- When adding the oreo cookies to the food processor, make sure to ddd in the entire cookie with the filling. The filling is needed just as much as the cookie to produce the right texture for the truffles.
- Don’t use “Double Stuff” Oreos for this recipe. The original Oreo cookies have the right amount of filling required for these truffles whereas the Double Stuff Oreos have too much filling and will compromise the texture of these treats.
- White almond bark, candy melts or Ghirardelli white chocolate wafers can be used for coating the mummy Oreo truffles instead of the chocolate chips. You will just need to omit the vegetable oil from the recipe since these alternative options don’t usually contain stabilizers as an ingredient, enabling them to melt much better into a smooth consistency without the aid of oil.
- If your melted chocolate looks and feels too thick, simply stir in 1 teaspoon of vegetable oil.
- Using a pair of clean craft tweezers will make it much easier when applying the candy eyes to your truffles. It’s also a great way to ensure a precise placement of the candy eyes but, of course, this is totally optional.
- The chocolate chips can also be melted over a double boiler if you don’t have a microwave at your disposal.
- It’s important that you allow your cream cheese to soften so that it mixes well with the crushed Oreos to form luscious truffle centers.



Dannii says
These are super cute. I am going to try making them with my kids at the weekend.
Gina says
Such a fun holiday treat! Kids love when we make these.
Michele says
Hi Gina,
I’m so glad your kids love it.
Michele
Toni says
This is such a fun idea for Halloween or even for a delicious treat any time! So delish!
Michele says
Hi Toni,
Yes, we had fun making these. Can’t wait to make them again this Halloween.
Michele
Michele says
Hi Dannii,
I hope you and the kids have fun making these!
Michele